February 20, 2017
Biscuit cakes are very often used in the preparation of cakes. We can say that this is the foundation of the foundations and the beginning of the beginnings.
Since having learned to cook the right and fluffy biscuit ny cake can go far in cooking. It's about cooking a large number cakes and pastries.
At the heart of the biscuit are only three ingredients flour, sugar, and eggs. It is important to learn how to cook a biscuit with simple recipe and then you can start experimenting. It is important to go from simple to complex and gradually complicate the recipes as you fill your hand, since this path will be the shortest.
And so the classic biscuit is eggs, flour, sugar. Many theorists argue that preparing the right biscuit is a troublesome business, but I am a practitioner and I argue that preparing a biscuit is a common thing. It's as easy as frying an egg for breakfast. The only difference is the baking time and that's it. So if you want to cook a biscuit for breakfast, you will have to get up very early, since the baking time is about 40 minutes or more. So it is better to prepare breakfast in the evening. But this is all a lyrical digression, and now directly to the point, so to speak. Read the recipes below and choose for yourself what you like best and unsubscribe in the comments under the post, as it is important for me to know how much my recipes could make your life easier.
And so for classic cooking biscuit take the next set of products.
Ingredients.
- 4 eggs
- Sugar glass.
- Flour glass.
Cooking process.
Separate the whites from the yolks. Separate the yolks from the whites.

Half a cup of sugar in proteins. And the rest of the sugar will go to the yolks.

Beat both well with a whisk, mixer, blender, combine, it doesn’t matter. It is important to beat the yolks until a viscous white foam.

Beat the whites also until foamy. But here the foam should turn out to be very viscous, almost standing. To check the readiness of the proteins, it is very simple to turn the bowl in which you beat the proteins upside down, if the resulting foam does not fall out of the bowl, then the proteins are ready.
And put it in the refrigerator so that the whites are better whipped is not worth it. This is an old myth that, as it was a myth, has remained nothing for you. The only thing that can speed up the process of whipping proteins is a pinch of salt. Yes, salt, quite a bit.
Mix whites and yolks in one bowl. And add prepared flour.

Mix everything well and voila the dough for the biscuit is ready. It remains to pour it into a mold and put it in the oven.

Preheat the oven to 160 maximum 180 degrees and put the form with the dough in it. Cooking time is approximately 40-60 minutes. Maybe less maybe more. It all depends on the characteristics of your oven.

To check the readiness of the dough, it is enough just to pierce it with a toothpick; if there is no dough on the toothpick and it is completely dry and clean, then the biscuit is completely ready. And it remains only to let it cool and you can get it out of the mold.
The recipe for a magnificent biscuit that always turns out
The second recipe is easier and faster.
For cooking biscuit cake we will take the same set of products, only the process will be slightly simplified.

Ingredients.
- 4 eggs.
- A glass of sugar.
- A glass of flour.
- A little salt.
Cooking process.
This recipe is simpler than the previous one in that the eggs here will not need to be separated from the yolks. And beat them separately from each other. This recipe whisks the egg yolks and whites together to shorten the cooking time.
Break the eggs into a bowl, add a little salt so that the eggs beat better and start working with a mixer. It is better to start beating the eggs at once at high speed.

Beat the eggs until a strong white foam appears. By this time, the egg mass should almost triple in size.
Now you can add sugar. Sugar is better to add parts for three or four calls. Continue beating and add sugar. If you pour sugar immediately, then there is a risk that the proteins will settle and the foam will sharply decrease in size, which should not be allowed.
Continue whisking until the sugar is completely dissolved.
When the sugar is completely dissolved, you can begin the process of adding flour. Of course, the flour must be sifted before this. That will help to enrich it with oxygen and give the biscuit more airiness.

We also add flour in three or four passes. It must be said that when preparing biscuit dough, with flour you need to do a little differently. When kneading the flour, you do not need to drive the spatula in a circle, mix the flour from the bottom up. This process of mixing flour allows you to keep the dough airy.
Grease a baking dish with vegetable or butter. Pour the prepared dough and place in the oven for 30-40 minutes. You need to bake such a biscuit at a temperature of 160-170 degrees.
If there is a desire and opportunity, raisins, fruits, nuts can be added to the dough.
Well, that's all our biscuit is ready, you can get it out of the oven and serve it to the table. It is possible that the first time you will not be able to cook a beautiful airy biscuit. It is possible that the eggs were not beaten to the desired state. Or the oven wasn't ready.
Therefore, do not be upset, but try to cook it again and again. Only practice and diligence will help you prepare beautiful and tasty biscuit cakes.
Biscuit recipe on kefir
For those who are the first to prepare a biscuit, it is difficult to cook a tall one. fluffy cake, so the housewives go for a little trick that helps beginners without much experience to cook the cake lush and airy. The addition of kefir makes the dough less capricious and more airy. From the recipe below you will learn how to cook a biscuit with the addition of kefir.

Ingredients.
- 4 eggs.
- A glass of sugar.
- A glass of flour.
- A glass of kefir.
- Salt a pinch.
- Soda teaspoon.
- Cocoa 2-3 tablespoons.
Cooking process.
We break the eggs into a bowl, add a little salt so that the eggs beat better and start working with a mixer or blender. Beat the eggs until a strong white foam. Add the sugar little by little and beat until the sugar is completely dissolved.
Add soda to kefir. Wait for the appearance of foam in kefir and add kefir to the eggs. Once again, mix everything well.
Sift flour, add cocoa powder and gradually mix with eggs and kefir.
Cocoa is in the recipe for beauty, so this ingredient is optional and can be neglected.
Gently mix the flour with the eggs until smooth and spread in a greased baking dish.
Bake at 160 degrees for 30-40 minutes. Willingness to test wooden skewer. If after piercing the biscuit the skewer remains dry, then the biscuit is completely ready. You can make tea and invite guests.
Honey biscuit in a slow cooker
Try making a biscuit in a slow cooker. And not a simple biscuit, but a honey one, besides, it is very easy to cook in a slow cooker.

Ingredients.
- 5 eggs.
- A glass of flour.
- A glass of sugar.
- Half a glass of honey.
- Salt.
- Baking powder for the dough.
Cooking process.
Beat the eggs without separating the yolks from the whites into a thick foam. Add sugar in several batches. To beat the eggs well, add a pinch of salt. Beat eggs for about 10 minutes.
Melt honey in a water bath until liquid. Let cool slightly and stir in beaten eggs.
Sift flour mixed with baking powder. This amount of flour will require about a teaspoon of baking powder. Gently mix flour with eggs and honey.
Lubricate the multicooker bowl with oil and pour the airy dough into it.
Set the baking program for 40-50 minutes. After cooking, let the biscuit cool slightly for about 10 minutes and you can get the finished cake on a plate.
Happy drinking tea.
What to do if the biscuit did not turn out
Of course, not the first time you get beautiful and lush biscuits. And what to do if the baking did not live up to your expectations. Well, do not throw it away, because so many products and time have been spent.
Break the sponge cake into small pieces of about 1 centimeter.

Separately, in a bowl, beat 500 grams of sour cream and two or three tablespoons of sugar. If desired, you can add cottage cheese, grated chocolate, honey to sour cream.

Dip the biscuit pieces in the cream and put a layer on a plate.
Lay out the second layer canned fruits. Cherries, apples, peaches, strawberries. Lay out the layers in a slide.
At the end, pour the slide with the rest of the cream, chocolate or just syrup. It turns out very tasty. And if you still let the biscuit soak well, then you won’t delay the guests by the ears from this treat.
How to make biscuit dough video recipe
Lush biscuit will definitely become the main decoration holiday table and will win the hearts of the most fastidious guests, and cooking it is quick and easy. A noisy festive feast or a family celebration is a good reason for the hostess to show off her culinary skills.
Each hostess has a culinary notebook for such cases, where a very tasty and simple recipe for a biscuit pie is carefully stored. Indeed, for dessert on big holidays, it certainly flaunts on the table gorgeous cake filled with fragrant chocolate or snow-white icing.
Biscuit: types and methods of preparation
There are many types of dough for a cake - puff, shortbread, exhaust. None of them can compare with a biscuit - juicy, fluffy, tender. Biscuit is a special type of dough, it is not always possible for professional culinary specialists. It is even more difficult for beginners, because it is necessary to strictly observe the number of ingredients, cooking processes, and the duration of baking biscuit dough.
There are many biscuit recipes, popular ones:
- fluffy biscuit in the oven;
- simple classic biscuit;
- delicious biscuit with berries, fruits, jam;
- chiffon biscuit.
Prepare a delicious biscuit pie:
- in a multicooker;
- bread maker;
- in the oven.
Biscuit dough is prepared:
- on kefir;
- on sour cream;
- without eggs;
- with cottage cheese.
Readers will be able to get acquainted with each of these biscuit recipes on the pages of the rubric, where they are presented in a simple, accessible language, without complex culinary terms unfamiliar to most housewives. Each guide is presented step by step with a photo, which is important for those who like to spend all their free time near the stove.
Recipes with photos and videos
Young chefs will not have any difficulties or problems if they listen to the advice of experienced chefs. There are a lot of tricks and secrets of making biscuit at home on the pages of the heading, professionals will be happy to help you avoid common mistakes and simplify the process. And they will tell you a secret very tasty and simple recipe for a biscuit pie. Cooking delicious biscuit always starts with the dough. Few people know that the structure of the finished treat depends on how the eggs are beaten with sugar. There are a lot of ways to do a difficult process correctly, in what order to add ingredients, readers will be able to find out on the pages with recipes for biscuit dough.
The success of baking depends on the successful dough and decoration. finished pie. For owners of artistic talent and boundless imagination, there will be no difficulties; they will do an excellent job with decorating a biscuit cake. For those who have never decorated a cake, colorful photos next to each biscuit recipe will help. The illustrations in the smallest detail show every detail that will help biscuit pies and cakes to turn into an original work. culinary arts. Help beginner bakers step by step photos cope with the preparation of dough for a biscuit, because questions will certainly arise, and numerous illustrations will help to find answers.
Increasingly, sponge cake cakes are being cooked not traditionally, in the oven, but in a slow cooker. The process is greatly simplified, you do not need to monitor readiness, but biscuit dough growing by leaps and bounds. Baking in a useful kitchen appliance is tender and delicious in taste.
The composition of the biscuit dough
The traditional classic biscuit consists of only a few components, but more and more often not quite ordinary additives are added to it - cottage cheese, honey, kefir. In the post, lean biscuit recipes that do not contain eggs will come in handy. You can enjoy amazing pastries even on a diet, if you exclude especially high-calorie ingredients. All these manuals will certainly be found on the pages, readers will only have to choose suitable recipes and go to the kitchen, create another delicious miracle.
There is a lot of information on how to make a biscuit at home on the Internet, in fascinating culinary magazines, and on television programs. But it is unlikely that it contains such a number of recipes that readers of the rubric expect! Everything is here - from the simplest guides to complex combinations, it remains only to compare the availability of food in the refrigerator, your capabilities and skills. The end result will certainly please all household or guests, especially if the hostess tried and created a huge cake!
No need to be afraid to prove yourself in new types of baking, even if a biscuit at home seems like an impossible task. Simple detailed recipes biscuits, available components, colorful photos, helpful comments and tips will help you overcome any obstacle!
A bit of history
Who invented the difficult and such delicious view baking, history does not mention, but the first records of the biscuit can be found in the ship's logs of the first sailors. delicious pastries dried, sent in boxes and used to the table during a long voyage. The biscuit was stored for a very long time, without being exposed to the appearance of the ubiquitous mold.
During one of the trips, a courtier decided to treat himself to a simple sailor's meal. french king. His amazement knew no bounds, because the pastries turned out to be hearty, tasty and pleasant. The sailor's delicacy after this tasting turned into gourmet delicacy, previously supplemented with cream, decorations and icing, and it was served only at the table of the monarch.
Well, what could be easier than baking a simple biscuit? Probably, many of you will not agree with me, because only experienced hostess. And in part you will be right. There are many nuances and subtleties in the preparation of classic pastries, which will be discussed in this article.
I baked my first "biscuit" at age 12, and what I got out of the oven looked more like an omelette than the cake layer I imagined. In those days, there was no Internet, cooking shows and magazines with colorful step-by-step recipes. There was only my mother's notebook with a list of ingredients and a short description of the process. And then no one really knew how to cook it, neither my mother's friends, nor my friends, and even more so my grandmother, who is my friend only with yeast dough.
A recipe verified to the gram and understandable proportions
But in twenty years, I did learn how to bake a real biscuit, thanks to a series of experiments and personal experience. And it is this recipe that I always give to my friends and relatives, and I will also pass it on to my still little daughter.

Friends, there will be a lot of text further, so please be patient, and I promise you that your first biscuit will be lush, airy, and incredibly tasty. As you can see in the photo, the cake can be cut into three parts.
List of ingredients
- 5 eggs
- 1 cup of sugar
- 1 cup flour
- 1 pinch of salt
Additionally:
- vegetable oil for greasing the mold
- baking dish with a diameter of 28-26 cm.
- glass 250 ml.
Cooking instructions
Prepare two comfortable and deep bowls in which it will be convenient to beat with a mixer. Check that there are no drops of water in the bowl in which we will beat the whites, the bowl should not only be dry, but also fat-free. Even a fraction of a drop of fat will spoil the biscuit. Therefore, make sure in advance that the protein bowl is dry and fat-free.
Now the most exciting part of the process: we need to separate the whites from the yolks. Carefully separate the proteins from the yolks, and make sure that even a small drop of yolk does not get into the proteins. As I wrote earlier, fat from the yolk, even in small quantities, will interfere with whipping proteins. If you are not experienced in separating the yolks from the whites, it is best to do this over a separate plate. If you spoil one protein, then the total protein mass will not suffer.
Now add half the sugar to the yolks.

Beat the yolks with sugar with a mixer until the sugar is completely dissolved, and set aside.

Cold proteins are the key to successful baking
One of the most important rules for making a biscuit is that the proteins must be cold, otherwise they simply will not whip. If you did not have time to cool the eggs in advance, then put the bowl with the separated proteins in the freezer for 10-15 minutes, where they will quickly cool. Add a pinch of salt to the chilled proteins.

Beat the whites with salt with a mixer at high speed in a lush foam. At this stage, it already becomes clear whether a biscuit will turn out or not. If the squirrels are whipped into a beautiful foamy hat, then everything is fine, we can move on. Gradually add the remaining sugar to the whipped proteins, and continue to beat the proteins until the sugar is completely dissolved.


No sudden movements!
Gradually introduce into protein part in egg yolks whipped with sugar. This must be done very carefully so that the biscuit mass does not sit down, at the lowest speed of the mixer, but it is better to stir clockwise with a spoon to be sure.

We do the same with flour, which must be sifted in advance. Add the flour to the biscuit dough one tablespoon at a time, and mix gently at the lowest speed of the mixer, or with a spoon.

"French shirt"
Next, let's prepare the mold for the biscuit. We don’t need surprises, so we even lubricate the form with a non-stick coating vegetable oil with a brush, or with your hands, and sprinkle with flour. Excess flour must be shaken off. By the way, I just recently found out that this way of processing the form before baking is called “French shirt”.

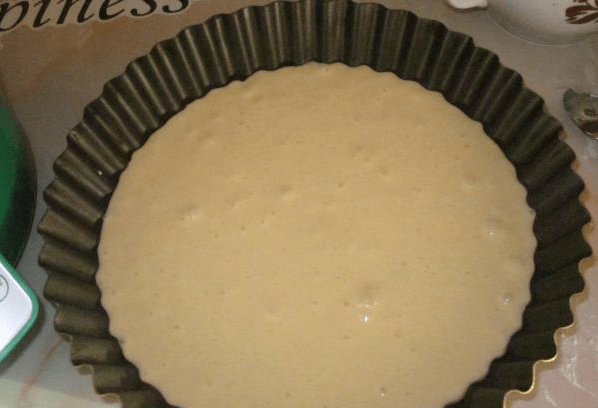
Pour the biscuit dough into a mold, and send it to bake in a preheated oven.

How to bake in the oven
If you are cooking for the first time, then you will probably ask me at what temperature to bake a biscuit in the oven? I answer: in the case of biscuit dough, extremes are not needed, the golden mean is 170-180 degrees. Bake - 30-40 minutes. Grid position in the middle. Do not forget that you cannot open the oven for the first 25 minutes, otherwise the biscuit will not rise.
We check the readiness of baking with a wooden toothpick or skewer. If the toothpick is dry and the biscuit is browned on top, then the pastry is ready. Do not immediately remove the form from the oven, because it may fall. Turn off the oven, open the door halfway, and leave the oven to cool.

Remove from oven, unmould and transfer to a plate. After cooling, the finished biscuit falls a little, and the surface wrinkles, but still remains lush and airy.

Well, that's all my friends, I hope I didn't confuse you too much. As you can see, there is nothing complicated in preparing a classic biscuit. The main thing is to follow all the above recommendations, and you will certainly succeed.
What oven to bake biscuits in? Both electric and gas ovens are suitable for baking. In an electric baking oven, turn on the top and bottom heating without convection. Grid position in the middle. For gas oven, turn on only the lower heating, the position of the grate is also in the middle and without convection.
Which oven to put the biscuit in? For guaranteed results - perfect biscuit, the form with the dough must be placed in a preheated oven. But more than once I put the form with the dough in a cold oven, and the biscuit rose perfectly. Therefore, if you are at a crossroads to put a biscuit in a hot or cold oven, it is better to choose a hot one.
Why won't the cake rise in the oven?
Oven seal broken. This feature is typical for old Soviet ovens. Over time, the rubber seals dry out, and extraneous air enters the oven during the baking of the biscuit. If you have a modern gas or electric oven, then there is nothing to worry about.
Do not open the oven with a biscuit for the first 25 minutes. The biscuit settles in the oven if you open the oven door earlier. Set yourself an alarm, or watch through the glass as the dough rises in the form and the top browns.
Added too much flour. Flour in the dough should not be added by eye, but according to the recipe. There is a very simple proportion for a biscuit: 1 tablespoon of flour goes to 1 egg. In my recipe, this proportion is maintained: 5 tablespoons of flour are placed in a glass of 250 grams. This proportion will come in handy if you want, for example, to bake a biscuit for 7 or 9 eggs. The same proportion applies to the sugar in the recipe.
The flour was not sifted. If you are baking a biscuit for the first time, then you should not ignore this step. Be sure to sift the flour to enrich the dough with oxygen, because classic pastry prepared without soda and baking powder, so oxygen is most welcome here.
Use of domestic eggs. The yolks in homemade eggs are always higher in fat than in store-bought eggs, so for the best result, I always bake with store-bought eggs.
Recipe for a classic biscuit cake
4.8 (95.56%) 18 votesIf you liked the recipe - put stars ⭐⭐⭐⭐⭐, share it on social networks or write a comment with a photo report of the dish you cooked. Your feedback is the best reward for me 💖💖💖!
Biscuit is a universal pastry for confectioners. Almost no cake can do without a biscuit, cakes and rolls are made from biscuit, they are used as the basis for any confectionery.
Lush, like a cloud, and quite dense, with butter and cream, with nuts and carrots - they are very different, but they are united by the technology of preparation. Whatever the biscuit dough, for it you just need to beat the eggs (or separately the whites and yolks) and add the rest of the ingredients as carefully as possible. It is due to the air added during whipping that your biscuit will rise in the oven.
When baking a biscuit, two processes occur simultaneously. Firstly, the air in the dough heats up and, accordingly, expands, it causes the dough in the oven to rise, that is, to increase in volume. Secondly, if there is enough heat (at a baking temperature of 180-200C), the walls of the growing pores are baked. Thus, to get the right biscuit, you need to beat the eggs well, adding as much air as possible, mix the dough, trying not to lose the added air, and then bake it properly at a sufficiently high temperature.
Before carefully studying the technology of Irina Chadeeva, we suggest watching the video recipe of professional confectioner Oleg Ilyin!
What do we bake from?
FLOUR
Biscuits are baked thanks to the starch gelatinization process - when heated in a wet dough, it changes its structure, becoming thicker and more viscous. Therefore, it is the presence of starch that is important for a biscuit, and, accordingly, it can be baked from almost any flour - rice, wheat, corn, buckwheat (any flour contains starch). If you replace a part wheat flour starch - the biscuit will be more durable and crumbly. You can bake a biscuit without flour at all, only on starch. But in nut flour (ground nuts) there is no starch, and therefore biscuits with nut flour are less durable and easily settle. Nevertheless, confectioners often make biscuits with nuts - it turns out very tasty!
EGGS
Without which, in principle, it is impossible to bake a biscuit - so it is without eggs. It is the eggs that give it both splendor (when beating) and strength (when baking). A well-beaten egg mass is the key to success when working with a biscuit.
SUGAR
For a biscuit, take regular sugar, preferably with small crystals. They dissolve faster, respectively, and the eggs beat better with them.
Basic biscuit recipe
There are many options for a biscuit, but it’s worth starting with the simplest recipe, which, however, is no worse than the most complex ones. Remember the proportion:
4 eggs
120 g sugar
120 g flour
and no baking powder!
How to make a biscuit:
1. First, measure out all the ingredients. Sift flour (as well as starch, if using) - it is saturated with air and then it is better mixed in the dough. Separate the eggs into whites and yolks (remember that cold eggs separate best into whites and yolks), while using a large bowl for whites and a medium-sized bowl for yolks.
Please note that the forms and baking sheets for biscuits must be prepared in advance, and the oven should also be preheated in advance. When the biscuit dough is ready, it must be immediately transferred to the mold (on a baking sheet) and baked without wasting time. Biscuit dough settles quickly, and finished goods from the settled dough they turn out low and sticky.
2. Pour half the sugar into the yolks and beat with a mixer at maximum speed into a thick, almost white mass.
3. Wash and dry the whisks and beat the whites at maximum speed until the mass is white and thick. Mixer attachments should leave a clear, non-blurring mark. Only now add the remaining sugar and beat further until the mass becomes snow-white and shiny.
 publishing house "Mann, Ivanov and Ferber"
4. Add the yolks to the whites and mix very gently with a spoon so that the mass becomes homogeneous, light yellow in color.
How to mix correctly? Take a spoon and lower it sideways into the middle of the bowl. Swipe the convex part of the spoon along the bottom (towards you), then up the wall of the bowl, continue moving over the dough and again lower the spoon into the middle. The spoon will describe a circle. Repeat this movement while turning the bowl with your other hand. Thus, all types of biscuit (and other whipped) dough are quickly and gently mixed. This method is called the "folding method".
5. Add flour and other dry ingredients. Stir again by folding. Do not mix too long, as the dough may become too dense.
 publishing house "Mann, Ivanov and Ferber"
As soon as the lumps of flour have disappeared, stop. Pour the dough into a mold, smooth the surface and place in the oven.
 publishing house "Mann, Ivanov and Ferber"
What to add?
Butter is often added to the biscuit. To do this, it is melted, cooled and poured as carefully as possible. Even a small amount of butter makes the crumb more tasty and moist, biscuits with butter do not stale longer.
How to prepare a form?
There are several ways to prepare the molds and bake the biscuit. Each has its own advantages and disadvantages. Sometimes it doesn't matter what form you bake in, and sometimes it matters.
Method number 1
Brush the inside of the pan with softened butter (the melted butter will run off and not evenly coat). Pour a spoonful of flour and, shaking the form, distribute the flour first along the sides of the form, and then along the bottom. Tap the mold well to pour out the excess flour.
With this method, the biscuit does not stick to the bottom and walls of the mold at all. After baking for 5–10 minutes, the biscuit cools down and slightly decreases in size, while a small gap appears between the mold wall and the biscuit, and a small slide remains on the biscuit. Turn the biscuit over onto a wire rack, it will easily come out, while the slide will be at the bottom, and the top will be completely even.
DISADVANTAGE: when using this method, the biscuit is slightly lower.
Method number 2
Do not grease the mold, but cover the bottom with baking paper.
When baking, the biscuit will stick to the walls, but when you take out the mold, it will also settle. Since the walls cannot settle (they are stuck), the “hill” will settle, thus, when cooling, the surface of the biscuit will become even. The biscuit is taken out of the mold only when it has completely cooled down. To do this, very carefully run a knife along the walls, separating the biscuit, and remove the mold. The baking paper is removed before using the biscuit.
DISADVANTAGE: in order to separate the biscuit from the walls, skill and accuracy are needed; Do not use silicone molds.
Method number 3
Do not grease the mold and do not put baking paper on the bottom.
 publishing house "Mann, Ivanov and Ferber"
This method is suitable for the lightest and tender biscuits, which are deposited upon cooling under their own weight. These are biscuits with a small amount of flour and starch, as well as protein biscuits. Usually they are recommended to be cooled upside down - for this, immediately after baking, the form is turned over and placed on bowls so that the biscuit does not touch them. In this position, the bottom and sides of the biscuit are glued to the form, it does not fall out, but it does not settle under its own weight either. Please note that in this case it is important to choose the right size of the form so that the biscuit does not turn out above the edges and can be turned over.
DISADVANTAGE: sometimes it is difficult to separate the biscuit from the form; silicone molds are not suitable for such baking.
Bakery
Always preheat the oven to 180–200°C in advance. It is desirable to bake biscuits on the middle level of the oven, you can use convection. Try not to open the oven during the first 15 minutes of baking so as not to cool the air. You can check the readiness of the biscuit 25-30 minutes after the start of cooking. Ready biscuit - always with a uniform slide, golden brown. Pierce it in several places (closer to the middle) with a toothpick, there should be no sticky dough on it. You can also press with your palm finished biscuit resilient and durable.
IMPORTANT!
So that the biscuit does not get wet during impregnation, is strong and elastic, it is advisable to let it lie down for several hours. For cakes, I usually bake a biscuit in the evening and leave it in the kitchen overnight. Please note that the biscuit should not dry out - for this, if the air is dry in the kitchen, you can remove the biscuit into a bag after complete cooling.
 publishing house "Mann, Ivanov and Ferber"
How to cut a biscuit?
One four-egg biscuit, baked in a 20 cm diameter pan, can usually be cut into three cakes. To keep the cuts even and the cakes the same thickness, use a few simple tricks.
Lay the biscuit upside down - it is very flat and your cake on top will be flat too. It is convenient to use a sheet of baking paper, a flat plate or a wire rack as a substrate, the main thing is that you can easily turn the cake along with the base. Prepare a knife - it is highly desirable that it be sharp, with a blade that is longer than the diameter of the biscuit. A bread knife with a wavy blade is very suitable.
Use a knife to mark cut lines about 1 cm deep around the circumference of the biscuit.
Insert the knife into the cut and cut, carefully turning the biscuit and pressing the knife against the bottom cake, it should go exactly along the marked line.
Problems?
- Too much batter- Poorly whipped whites or yolks, the dough was stirred for too long;
- The biscuit does not rise well - the dough was stirred for a long time, the eggs were not beaten well, the oven is too cold;
- The biscuit sagged heavily after baking - the dough was badly baked, there was little flour or starch;
- Biscuit donkey in the oven - too hot oven;
- Biscuit crumbles a lot - too much starch.
With all the variety of recipes for preparing homemade delicacies, the biscuit remains the favorite. If there is a golden fund in the world of cooking, then this delicious, lush pastries goes right in there. A minimum of available ingredients, several cooking methods and an uncountable number of filling variations. If you want to know the secret of how to cook delicious biscuit cake at home - follow the recommendations of step-by-step recipes with photos and watch the video.
How to make sponge cake dough
Only three products will be needed to make a biscuit cake: sugar, eggs, flour. And then you can try different ways how to make the base so that the finished biscuit is lush. A simple method involves beating the eggs with sugar until the consistency of thick sour cream, then gradually introduce the sifted flour. Regardless of the recipe chosen, this must be done several times, so that the biscuit dough turns out to be magnificent. In some recipes, flour is mixed with starch in certain proportions, which helps to make the sponge cake more airy.
Classic recipe
Acquaintance with the features of cooking the most popular homemade pastries is better to start with this recipe. classic biscuit will debunk the myth that preparing dough, baking a cake based on this recipe is a troublesome business. You will be able to cope, even if for the first time you are trying to prepare a sweet treat for tea. Prepare the products, and then feel free to get down to business, following the recommendation from the photo: barely half an hour has passed before your finished biscuit will decorate the table.
Ingredients:
- 5 eggs;
- 200 g of sugar;
- 1 glass of flour;
- a pinch of salt.
Cooking:
- Take the eggs, separate the whites, setting them aside. Combine yolks with sugar, grind until uniform consistency. Beat the whites with a mixer, adding a pinch of salt.
- Sift flour, combine with yolks, mix. Next, gently fold in the beaten egg whites.
- Pour the dough into the prepared form, put the container for half an hour to bake at a temperature of no more than 200 degrees.
- Cut the finished cake lengthwise into two parts, grease with cream, connect the halves, decorate on top to taste.
Honey
The tenderness of a honey biscuit will conquer even those who do not have a particular weakness for baking. The pronounced taste of bee nectar adds spice; sour cream is ideal as an impregnation for honey biscuit. So that the biscuit dough does not settle during baking, experienced bakers advise not to separate the proteins from the yolks, whipping them together with honey.
Ingredients:
- 400 g flour;
- 2 eggs;
- 2 tbsp. spoons of honey;
- 150 g butter (butter);
- 150 g sour cream;
- 1 sachet vanilla sugar;
- a pinch of salt.

Step by step process cooking:
- Beat the eggs, add honey and mix the ingredients again with a whisk.
- Then add softened butter, sour cream, salt. Flour is gradually introduced last, after which the dough is left for a quarter of an hour.
- Bake at medium temperature, in duration it takes no more than half an hour.
Chocolate
This version of the sponge cake is a true treat for the sweet tooth. The main ingredient is chocolate, which, like other products, is best prepared in advance. The peculiarity of preparing dough for a chocolate biscuit is that the eggs do not need to be cooled, on the contrary, they should be room temperature.
- 100 g flour;
- 190 g of powdered sugar;
- 6 eggs;
- 80 g butter (butter);
- 30 g cocoa powder.

Cooking process:
- Whisk the eggs with powdered sugar on steam bath about five minutes, then remove the bowl, continuing to mix the ingredients for about 10 more minutes until fluffy. Its volume should double.
- Sift flour, mix with cocoa, gradually add the mixture to the egg mass, about a third, each time mixing thoroughly.
- Before the last addition of flour with cocoa, pour in half the volume of melted butter. Stir, add the last part of the flour again, pour in the remaining oil again. Knead the dough until a homogeneous consistency.
- Preheat the form, lay parchment, lay out the biscuit dough in an even layer, bake for about half an hour. An important point: do not open the oven all this time!
- Readiness is checked with a wooden stick, and before serving, grease the cakes with cream.
How to make cream for biscuit cake
The first mention of biscuit appeared four centuries ago. During this time, the recipe for making dough has changed little, which cannot be said about creams. Biscuit, as a base, goes well with the main types of fillings for cakes - from custard or butter cream to chocolate or yogurt. Each type of cream is prepared according to a specific recipe based on mixing several products. There are creams that are prepared by simply mixing the ingredients, and there are those that require a little more attention. You will learn how the most popular biscuit creams are prepared below.
Custard
Most gentle version cream, which classic recipe prepared with milk. The second mandatory ingredient is eggs, while there are variations custard, for the preparation of which only yolks are used. To prepare the classic choux pastry needed the following ingredients:
- 4 eggs;
- 500 ml of milk;
- 1 cup of sugar;
- 40 g flour.

Cooking method:
- Mix the eggs with a whisk with sugar.
- Then add the sifted flour vanilla sugar.
- Next, pour in cold milk, mix thoroughly again with a whisk or mixer.
- Put the container on a small fire, bring to a boil, stirring constantly.
- When the cream thickens, remove, cool slightly, grease the cakes.
sour cream
cooking yourself plain cream for a biscuit will take a couple of minutes. This type of cream is so simple and light that it has become universal for different categories of home baking. If you take not very fatty sour cream, then you don’t even need to use a thickener to prepare the cream: you just need to mix the ingredients thoroughly and grease sour cream biscuit.
Ingredients:
- 400 g sour cream (fat content less than 20%);
- 150 g of sugar;
- a pinch of vanilla.

Cooking:
- Mix sour cream, sugar, vanilla in one container using a mixer.
- Beat for about 10 minutes until the sugar is completely dissolved. On request in ready cream add jam, crushed nuts.
Curd
By giving preference to this type of biscuit filling, you can prepare a low-calorie cream. At useful stuffing the taste is more delicate if you mix cottage cheese with cream. A sweet rich aftertaste is obtained when curd cream cooked with condensed milk. For basic recipe need to take following products:
- 300 g of cottage cheese;
- 150 g of sugar;
- 200 g butter (butter).

Cooking:
- Mash the cottage cheese, but it is better to rub it through a sieve.
- Then add softened butter, sugar, vanilla.
- Beat with a mixer until a homogeneous mass is obtained.
Step by step biscuit cake recipes
beautiful cakes give true aesthetic pleasure. But before a culinary masterpiece decorates the festive table, it must be cooked. Help to do it right, quickly and without much hassle step by step recipes. So that the finished delicacy is not only attractive in taste, but its own appearance made me want to try again, photos are attached along with recommendations. By following all the steps step by step, you will be able to learn how to bake a biscuit cake worthy of the title. culinary masterpiece.
With cream cheese cream and peaches
The delicate taste of the cake prepared according to this recipe will be emphasized by creamy curd cream. Impregnation of the base with this type of cream will turn homemade cakes in the most desired treat of the festive table. Peaches – whether canned or fresh – will add a tangy, fruity touch while acting as a cake garnish, just like
- 3 eggs;
- 120 g flour;
- 300 g of sugar;
- 0.5 cups of water;
- 1 teaspoon of rum;
- 300 g of cottage cheese;
- 200 g cream;
- 100 g peaches.

Cooking process:
- Beat eggs and 100 g of sugar so that the mass doubles, pour the sifted flour. Bake the dough in the preheated oven for about 20 minutes.
- Prepare syrup: mix water, one glass of sugar and a teaspoon of rum, boil, stirring constantly.
- Get the finished cake, cut it, pour over the halves of the cooked sugar syrup, let cool.
- During this time, make a cream by whipping the cottage cheese with cream, vanilla with a mixer until smooth.
- Spread the halves of the biscuit cake to make the cake juicy, spread the cream on top. Decorate the pastries with slices of peaches, sprinkle with grated chocolate.
Soufflé with mascarpone and berries
When choosing this recipe for making a delicious homemade treat, keep in mind that it will have to be put in the cold for several hours. Biscuit in a variety of souffle cake is prepared in advance before festive feast, but this delicacy is worth the time to prepare it and the wait before trying it. There is hardly more air cake, tidbits of which melt in your mouth.
Ingredients:
- 120 g flour;
- 60 g starch;
- 3 eggs;
- 4 tbsp. spoons of sugar;
- 60 g cocoa;
- 250 g mascarpone;
- 150 g of sugar;
- 100 ml cream;
- 5 g gelatin;
- 100-150 g of any berries (raspberries, cherries).

Cooking process:
- Soak the gelatin so that it has time to swell before the preparation of the cream.
- Break the chicken egg, separate the protein from the yolk, grind the latter with half a glass of granulated sugar so that the mass doubles. Then pour the sifted flour, starch here. Next, fold in the beaten egg whites.
- Divide the resulting volume of dough into three parts, bake cakes.
- During this time, you need to prepare the cream. IN enamelware pour 100 g of sugar, minced berries, heating it all over low heat. Then pour in the cream, stir until the mixture thickens. Introduce swollen gelatin into the cream.
- Separately, mix the mascarpone with the remaining volume of sugar.
- Alternately smear the finished cakes berry cream and whipped. Refrigerate to soak the cake.
With jelly and fruit
To make a cake with jelly layer, you must have experience in baking. Extraordinarily delicious dessert belongs to the complex category, but its taste is worth it to improve culinary skills. Tenderness, lightness of biscuit dough is ideally combined with the softness of jelly, dessert is especially relevant in winter season.
Ingredients:
- 150 g flour;
- 4 eggs;
- 5 st. spoons of sugar;
- 1 teaspoon of baking powder;
- 2 packs of jelly;
- 3 art. spoons of any jam (jam, jam);
- fruits for decoration.

Cooking process:
- Make dough: beat eggs with sugar, add flour, vanillin, baking powder, bake cakes. It is advisable to spread the dough in a form in a thin layer, so that later the finished cakes do not have to be cut.
- Prepare jelly, cool the resulting mass, pour it on the cakes, previously smeared with jam. Connect them, make decoration on top, sprinkling coconut flakes and laying out fruits (apples, strawberries, lemon, orange, kiwi).
- Put the cake in the refrigerator after 5 hours tender delicacy with fruity accents, you can serve it to the table.
Chocolate cake with protein cream and banana filling
You do not have to think about how to prepare such a delicious tea for tea drinking. One simple recipe connected several delicious ingredients, which individually cause a desire to eat a cake, but all together do not leave a chance for a sweet tooth. Baking classics - chocolate biscuit– ideally combined with airy protein cream and a delicious fruity taste banana filling.
Ingredients;
- 100 g flour;
- 4 eggs;
- 50 g cocoa;
- 5 st. spoons of sugar;
- 3 squirrels ( chicken eggs);
- 0.5 cups of powdered sugar;
- 3 bananas;
- 2 tbsp. spoons of grated chocolate.

Cooking:
- Knead the biscuit dough, beating the yolks with sugar separately, and the whites in another bowl. Add flour, cocoa, mix, bake cakes.
- During this time, make a cream by whipping the egg whites with powdered sugar with a mixer to form an airy foam.
- Lubricate the cooled cakes with protein cream, spread the banana sliced \u200b\u200bin circles, connect them, soaking the rest of the cream on top, and decorate the top with bananas and grated chocolate.
Video recipes for making dessert at home
Experienced chef knows how to cook delicious biscuit pastries, observing proportions, temperature and some other nuances. But the popularity of the biscuit was ensured not only by its unique delicate taste: baking is not a hassle even for those who have little culinary experience. How to make a delicious biscuit cake at home? What products to buy, where to start and how to decorate a delicacy so that no one can resist the temptation to try it, you can find out from the video below.
With strawberries and whipped cream in a slow cooker
in the microwave
From ready-made cakes with condensed milk
Air sponge cake decorated with mastic
Biscuit cream with meringue and nuts
In the oven

