Today we will consider basic recipe ice cream ice cream at home. Preparing this chilled dessert on your own is not at all difficult if you carefully follow the recipe and take into account all the recommendations.
Creamy ice cream at home is very tasty, with a delicate and smooth texture, as well as a pleasant vanilla aroma. At the same time, unlike store-bought ice cream, our dessert consists only of natural products, without all kinds of chemical flavor enhancers, thanks to which you can safely please a portion of the chilled delicacy of the little sweet tooth.
Ingredients for 2-3 servings: 
- cream from 33% - 200 ml;
- milk - 100 ml;
- egg yolks - 2 pcs.;
- sugar - 60 g;
- vanilla pod - 1 pc.
Plombir ice cream recipe at home with a photo
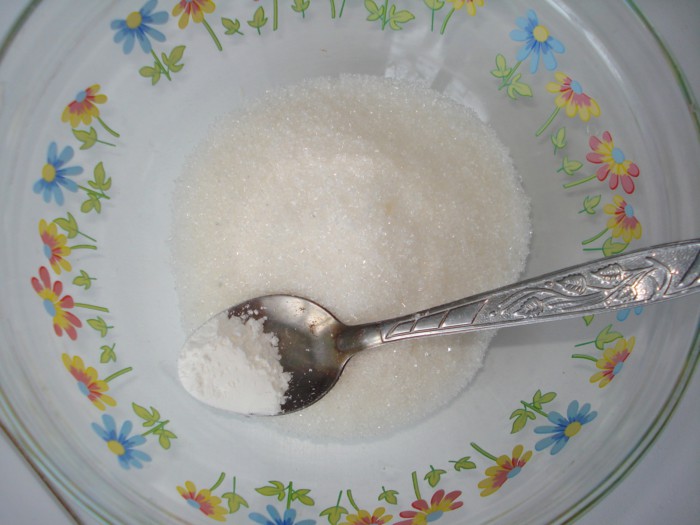
- Combine milk and sugar in a small heavy bottomed saucepan. We cut the vanilla pod along the entire length with a knife blade, remove the seeds and also add to the milk mass. Thanks to vanilla, ice cream is saturated with a delicious natural flavor, but in the absence of this ingredient, you can get by with a bag. vanilla sugar or a pinch of vanilla. Heat the mixture until hot, not boiling.

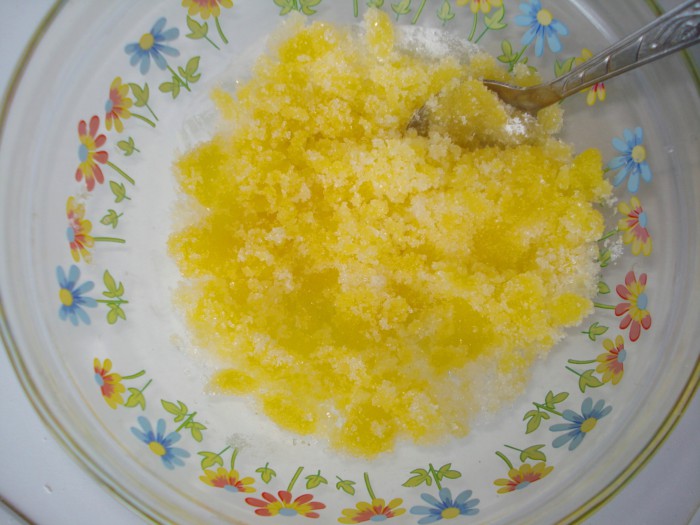
- In another container, grind the egg yolks with a whisk. It is not necessary to beat the mass vigorously until foam is obtained, it is enough just to achieve uniformity.

- Pour hot milk into the mashed yolks in a thin stream, continuously stirring the mixture.

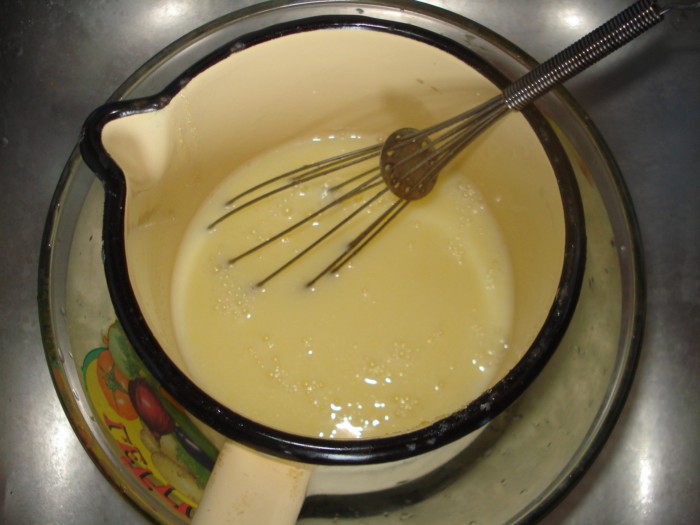
- Pour the resulting composition into a saucepan, put on a small fire and cook until lightly thickened. It is important not to overheat the milk, otherwise the yolks may curdle! To avoid this trouble, choose a saucepan with a thick bottom for cooking the cream and cook over low heat. Also, do not forget to constantly stir the cream, especially at the bottom (it is most convenient to use a silicone spatula for this).

- We check the readiness as follows: run your finger along the silicone spatula. If the trace remains clear, and does not swim with cream, immediately remove the pan from the heat. Tip: if the yolks are still curled up, you can grind the mass through a fine sieve or puree with an immersion blender. However, unfortunately, it will no longer be possible to avoid the egg taste in ice cream. AT this case It's better to take the pan off the heat sooner rather than later.

- Refrigerate freshly prepared cream room temperature. At the same time, beat the cold cream until stiff.

- To the whipped creamy mass, spread the cooled cream and mix. Cool the mixture in freezer within 3 hours. During this time, it is necessary to take out the container 5-6 times and mix the mass thoroughly in order to avoid the formation of ice crystals and obtain a smooth and uniform texture.

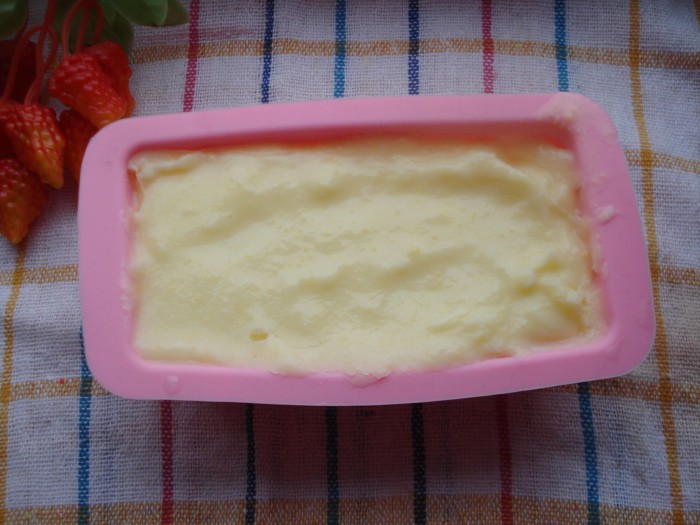
- When the consistency of the blank becomes similar to soft ice cream and will be difficult to mix, transfer the mass into a silicone mold, cover with a lid and put it in the freezer for another 3-4 hours (you can leave it overnight).

- Before serving, let the frozen ice cream stand for a while at room temperature. Then we collect a slightly melted mass with an ice cream spoon and form balls. Optionally, we supplement the dessert with chocolate chips, mint leaves or berries.

Vanilla ice cream at home is ready! Enjoy your meal!
On a hot summer day, you always want something cold. And these days, ice cream sales are especially increasing in stores. We also often buy it, children, grandchildren love it, and we ourselves are not averse to eating it. But if you buy it good quality, it is quite expensive. And the bad, with all sorts of additives and oils of vegetable origin - and you don’t want to eat.
But why buy when you can cook it yourself, and of the highest quality, and with a variety of tastes.
There are many ways to do this. And they are all relatively simple and easy. Depending on the chosen cooking option, you can spend from 5 minutes to half an hour, and get the product without any extra additives, only from natural milk, cream, sugar and sometimes eggs.
And for this you don’t need an ice cream maker, because in some recipes you just need to beat the ingredients with a mixer, and then mix them several times either with a spoon or with the same mixer. And that's it, after a few hours of cooling, the delicious chilled product is ready to eat. Moreover, he has such a taste that he wants to eat and eat.
Our article today will just be about this wonderful cold dessert, and about him different types. This is a real ice cream, and creme brulee, and strawberry, and your favorite chocolate. And if you like other tastes, then it is easy to create them based on any of the methods proposed today.
This is my favorite recipe and therefore I decided to start today's story with it. I have had it for a very long time, and in my recipe book it is listed as “real ice cream”.
Later, I came across similar recipes, where this delicacy is called “Soviet-era ice cream”, or “ice cream according to GOST”.

I can say one thing for sure, this is a real delicious cold dessert, very tender, airy, melting in your mouth. Who prepares it at least once according to this option, he forever enters it into his piggy bank of recipes.
We will need:
- milk 3.4 - 4.5% - 200 ml
- cream 33% - 500 ml
- powdered sugar - 150 - 200 gr
- egg yolks - 4 pcs
- vanillin - 0.5 tsp
For large sweet tooth, the second value of the amount of sugar is used, and for those who are calm about sweets, but love ice cream, you can use its first value. You can also take the average. In general, try to cook once, then you can more precisely regulate this sweetness.
Cooking:
When buying ingredients, be sure to look at the percentage of the dairy product, this is important for getting a quality and tasty treat.
The whole cooking process consists of three stages: cream preparation; whipping cream; cooling the resulting mixture.
1. The first step is to prepare the cream. To do this, separate the yolks from the whites.

Then place them in a bowl.

2. Pour in to them powdered sugar, vanillin and pour in milk.

Armed with a whisk, mix the mass until smooth. At this stage, we don’t need a mixer yet, the mixture does not need to be whipped.

3. Pour it into a saucepan and put on fire. With constant stirring, bring it to a boil, small bubbles will begin to appear, but it should not boil.

Fire for this should be minimal.
4. The next step is to slightly boil the cream.
When you cook ice cream with condensed milk, you do not need to cook anything. There you simply churn the cream and combine it with condensed milk. It is a binding element and a thickener, in fact, due to which a viscous cold dessert is obtained.
This is where we cook custard in milk and yolks. In this case, their task will be to connect all the components.
5. It should be boiled for about 20 - 25 minutes until it becomes viscous and slightly thickened from liquid. At the same time, it will need to be stirred almost constantly so that it does not burn and does not go “grains”.

Readiness can be checked in this way - dip a wooden spatula into the mixture, take it out and let the main mass drain. Then draw a longitudinal line with your finger on the remaining cream, and if it does not connect when tilted, then the mixture is ready.
Try not to form grains in the cream. If the fire is too big, then they may appear. In this case, take a whisk and work with it. In general, it is better to mix the mass with a silicone or wooden spatula.
6. When the cream is ready, put it in a bowl with cold water leaving it in the saucepan of course. Stir with a spatula, the water will quickly warm up and become warm. Then you can drain it and pour a new one.
It happens that ice is also used for cooling. That is, spread it in a bowl of water and cooling is faster. I choose the first option, especially since by the time I churn the cream, the cream will have completely cooled down. You can by the way, and once again change the water to a colder one.
7. Let's proceed to the second stage. In order for the cream to be quicker and easier to knock down, they should be kept in the refrigerator for at least an hour beforehand. In the same place, cool the bowl, where we will knock them down and the beaters of the mixer. For dishes and appliances, the residence time in the refrigerator will be sufficient from 30 to 40 minutes.

When everything is cool, pour the cream into a bowl and start churning. At first, do this at a not very high speed, foam bubbles will appear.

8. Then the speed can be gradually added. After about 5 minutes of churning, the cream will begin to thicken. After that, it will take another three to five minutes to give them the desired state. It is also called "before the peaks appear." This is when non-falling peaks appear on the surface.

Well, this is for my mixer, its power is not so strong. You can knock down the cream in 3 minutes, if the power of the equipment allows it.
You can still check the readiness by swiping your finger over the surface, a groove should remain. At the same time, try not to "interrupt" milk product otherwise the ice cream will lose its lightness and airiness.
9. When you achieve the desired consistency, slowly pour in the cooled cream in two or three batches and continue to beat at low speed.
Someone at this stage simply mixes the mixture with spatulas, I knock it down, it seems to me that it is additionally saturated with oxygen, and if there are small lumps in the cream, they will completely break.

10. Put the resulting mass in a container, or two containers.
To make it freeze quickly, I divide it into two parts, and place it in two bowls. Now each of them should be closed with a lid and put in the freezer.

11. After 40 minutes, remove the bowls and mix the mass with a wooden spatula. Then cover again and put in the freezer. Do this three times, and all after 40 minutes.

Nothing bad will happen if you stir again after 45 or 60 minutes. But don't forget to do it. This is an important step. Thanks to him, we saturate the mass with oxygen, the ice cream will turn out to be very tender and airy.
And also this procedure will not allow small ice crystals to form in the mixture.
12. After the third time, put the containers with the contents back into the cold. This time already for 5-6 hours, or for the whole night.
13. Finally, it's time to try our delicacy. You can put it in small vases, or bowls.

Decorate to your liking - with grated chocolate, nuts, jam, pieces of fresh, canned berries or fruit.

Everyone who tries this ice cream for the first time is simply speechless. And they refuse to believe that this ice cream is cooked at home. Painfully it is tasty, gentle and fragrant.
Be sure to cook it, I am sure that such a dessert will not leave you indifferent.
Plombir from cream and condensed milk according to the simplest recipe
According to this recipe, you can prepare a cold dessert in literally 5 minutes, not counting the time for freezing, of course. And you only need two components for this.

The delicacy turns out to be simply magical - tender, airy and incredibly tasty.
We will need:
- cream 33% - 500 ml
- condensed milk - 250 ml
Cooking:
1. Place the cream in a blender bowl, or a bowl for churning. As you can see from the recipe, they need to have a fat content of a certain percentage. This is also necessary to obtain a high-quality ice cream without ice crystals, as well as for its taste.
If you use homemade cream with a fat content of 40% or more, then you don’t need to churn them, otherwise we will get not ice cream, but butter.
2. Whip the cream until firm peaks form. However, everything needs a “golden mean”, it is also not necessary to interrupt them, otherwise the final product will lose all its tenderness and velvety in taste.

3. Introduce condensed milk. Try to get them of good quality from a trusted manufacturer. Continue beating until you get an elastic, even, pleasant mass.
Try the mixture, if you want the dessert to be sweeter, then you can add an additional portion of condensed milk.
4. That's basically the whole cooking process. Now the mass remains only to be transferred to a container, or another suitable dishes and close it with a lid.

Put in the freezer for at least 2-3 hours, it should be completely frozen.
5. Then take out and spread out with a special spoon in bowls, or vases.

You can decorate with berries, pieces of fruit, chopped nuts, chocolate chips or jam. Enjoy the delicate velvety taste in hot weather.

In order for the ice cream ball to form better, it is better to moisten the spoon in hot water.
Video on how to make homemade ice cream without cream in 5 minutes
According to this recipe, you can really cook a delicious cold treat. And all for this we need 5 - 6 minutes. The time will depend on how well prepared you are physically.
Just kidding, of course, although there is some truth in every joke. And in order not to waste your time, we immediately proceed to the viewing.
Cool?! Like this!!! And it is not always necessary to wait for 5 - 6 hours until it hardens.
And for lovers of a slightly melted dessert, this is just a real find. I know many who don't eat it cold. She waits for it to melt, and then takes a small spoon and enjoys the delicious milky “coldness”.
Strawberry ice cream with whipped cream and condensed milk
I really love fruit and berry ice cream, and strawberry ice cream is my favorite. And here is one of great recipes which will not leave anyone indifferent.

You can prepare it in reserve. It keeps well in the refrigerator. And whenever you want to cool down a little, you can get it and enjoy it.
We will need:
- fat cream 35% - 250 gr
- condensed milk - 1 can
- strawberries - 300 gr
- lemon juice - 1 teaspoon
- powdered sugar - 2 tbsp. spoons
Cooking:
1. Strawberries sort, wash and dry. Place them in a blender and puree them.

Today we are preparing a strawberry delicacy, but in general, this recipe can also be prepared from other berries and fruits.
2. Transfer the puree to a bowl in which it will be convenient to mix the two mixtures. And pour in a can of condensed milk. Prepare a silicone or wooden spatula, and use it to mix both mixtures into one.

Send the bowl with the contents to the freezer for 30 minutes.
3. And while it is there to cool, prepare another bowl and pour the chilled cream into it. Take a product with at least 30% fat, otherwise they may not go astray. If the box says that this product is designed specifically for churning, then it will be just fine.
Also, in the same bowl, add powdered sugar and lemon juice.

Sometimes people ask why it is impossible to add sugar to the cream? Everything is very simple - powdered sugar will dissolve faster in the liquid component than crystals. And therefore it will be easier to bring them down.
Arm yourself with a mixer and knock everything into a single mixture until stable beautiful peaks form.

4. Now you can put strawberry puree into the mixture. Stir with a spatula, moving the mass from the edges to the center. After mixing, the mixture must be knocked down with a mixer until smooth.

Then put it in the freezer for 50 minutes.

5. Through due time take out the mixture and beat it again with a mixer. Then place the bowl, covered with a lid, back into the cold cooking space. This time it will take 5-6 hours for the ice cream to fully cook.

In principle, this is the whole cooking process.

At the right time, but not earlier than after 5 hours, the sweetness can be taken out and put into vases. Garnish with fresh berries and enjoy.
This is delicious homemade ice cream! Just lick your fingers.
Chocolate ice cream made from condensed milk without cream
A delicious cold dessert can be prepared not only from cream and milk. Sour cream is also great for this purpose. The treat is thick and tasty, with light chocolate aftertaste.

Cooking it is not difficult, and having cooked it once, you will certainly want to repeat the result soon.
We will need:
- sour cream 20% - 400 gr
- condensed milk - 1 can
- cocoa powder - 2 tbsp. spoons
Cooking:
1. Put sour cream in a bowl. Try to get it in the right percentage, and also make sure that it is quite thick.

2. Pour in the same jar of condensed milk and cocoa powder. If you do not like chocolate desserts, then you can not add cocoa.
Conversely, you can add a little more powder, then the taste of chocolate will appear more strongly, and the color of the product will be more saturated.

3. Mix everything together using a kitchen assistant - a mixer. You should get an even homogeneous mass without lumps.
4. Pour the mixture into a clean, dry bowl and send it to the freezer for 1 hour.
Then take out and mix with a whisk. This procedure will allow the mixture to be saturated with oxygen, which will make the final product tender and airy. It also prevents ice crystals from forming.

5. Then again remove the mixture into a cold chamber, and keep it there for not an hour, but two. Then take it out again and mix with a whisk. Or you can use a mixer by turning it on at a low speed.
6. You can repeat the procedure again after a couple of hours, or you can already leave the ice cream to cool for 5-6 hours, or even all night.
During this time, it should completely freeze to a state so that you can pick it up with a special spoon.

You can serve it with chocolate chips, or chocolate chips, or whatever you like.
Ice cream creme brulee without eggs with boiled condensed milk
What ingredients are used to make ice cream at home. And here is one of these options, where it is used boiled condensed milk. Are you saying they don't cook like that? How to prepare! And how delicious it is.

And the second feature of the recipe is that here we will not use eggs, neither whites nor yolks. Although today we have already considered other recipes without their participation.
We will need:
- cream 33% - 500 ml
- milk - 100 ml
- boiled condensed milk - 300 gr
Cooking:
1. Put boiled condensed milk into a bowl, pour milk into it and mix with a spoon or spatula until both components are combined into one. It will turn out to be a rather liquid, slightly stretchy mass.

Put her aside for now, let her wait for her minute.
2. Whip the chilled cream in a separate bowl. As soon as they become thick, stop churning, it is not necessary to be very zealous at this stage so as not to lose the airiness of the finished product.

3. Pour all the brownish milk mixture at once and mix with a spatula, moving the mass from the edges to the center. The result is a milky-creamy substance with a slight beige tint.

4. It can be transferred to a common container and placed in the freezer to freeze.
Or you can put the mixture into silicone muffin molds. Or maybe you have special containers for ice cream. It will be just wonderful!

The freezing time will depend on the volume of the container. Approximately it will vary in the range from 3 to 6 hours.
Then take them out of the molds and enjoy the taste.
Dear friends, I have specially collected such interesting and tasty homemade recipes for you in one article. As you can see, translating them into reality is not such a difficult task.
All you need is some free time, and a set necessary products. And then, you can enjoy your favorite dessert at least every day. At the same time, each time to invent different tastes and filling.
I wish you all a warm summer and bon appetit!
I can find the composition and proportions later, now I’m not at hand. In the meantime, I will describe the cooking process itself, as an answer to Pavel instead of a comment.
It makes sense to have a method of making homemade ice cream in your arsenal for one main reason - you will not put a single gram of inedible products there. Only natural, tasty and understandable: milk, butter, egg yolks, sugar, vanillin. Only hardcore, as the often famous Maria writes)).
Another reason to be able to make such ice cream is the ability to depict a chic ice cream cake in several tiers. Especially now there are various decorations that can be used for such a cake. Although I got by with berry juice, regular real chocolate and fresh berries. My children, probably, do not even remember that such a miracle was prepared by me for their birthdays several times. There was a time when there was nothing interesting on sale, no cakes or, as it is now, ice cream in jars, rolls, with filling, and so on. I had to turn on the fantasy, look for interesting recipes. I don't remember where I got this one from. Whether from an old book on home economics, or from the magazine "Family and School". That magazine printed amazing things to help parents.
First, like this: a mixture of milk (cream) - eggs - butter - vanillin - sugar is prepared. The milk is heated, dissolve the butter there in pieces in warm, not hot. The yolks are rubbed with sugar, there is vanillin on the tip of a knife. Then stir it into the milk-butter mixture. Bring to a boil, stirring to prevent the yolk from curdling.
Cool down. Pour the mixture into plastic bag(two together for reliability). Pour so that there is room for air - about 2/3 of the volume. This air will be the main preparation of our ice cream. Because there were no plastic clip-latches, I took ordinary wooden clothespins and clamped the tucked edges of the packages with them. The package fits flat in the freezer.
All this is frozen in the freezer by half. Then it is whipped by shaking the bag in the hands. It takes a little skill here. From the heat of the hands, the mixture is slightly leveled in consistency, and it can not be heated too much. It is better to wear mittens or do it through a towel. Throw the package back and forth in your palms. The milk mixture is saturated with air. So we repeat several times (freeze-shake) until the state of soft ice cream.
Several servings are made in different packages. This allows you to add different fillers to them - grated chocolate, juice or fruit puree(very little!). Lay out in cake molds and freeze again. We take it out, slightly warming the bottom of the form from the outside in hot water and put it in a pyramid on a wide dish.
Before the guests arrive, put the cake back in the freezer. We turn the bags after ice cream and lick the tasty leftovers))
Now you will not surprise anyone with ice cream, which is not available in stores. But still, the most delicious ice cream was in the distant Soviet times. The taste of Soviet ice cream(who remembers) will never be forgotten. So tender, soft, fragrant and very tasty.
Let's, and we are with you today, prepare homemade ice cream. But not a simple creamy ice cream, but a cream and condensed milk ice cream, without the addition of eggs. Such ice cream is prepared very quickly, except for the time when it is frozen.
Be sure to check out these recipes:
But, after all, it’s ice cream for that, it needs to be in the freezer. And, the process of making homemade ice cream, in this case, ice cream, is incredibly fast. Heat and cook, we will not do anything. In this recipe, by the way, step by step photos(for your convenience), products, we only whisk.
Well, are you ready to prepare the most delicious homemade ice cream - cream and condensed milk ice cream? Then let's first see what products we need for this.
homemade ice cream recipe
Products used:
- cream (30-33%) - 200 ml.,
- condensed milk - 70-100 ml.,
- vanilla sugar- 1 package.
How to make homemade ice cream:
If you have never made ice cream, then I urge you to do so today. Some of you may say, yes, I'd rather buy in the store. And, I want to answer you that it is not better. You still try to make your own. I'm sure you won't want to shop later.
As I have already said, that all products, we will beat with you. We take something high, you can use a blender bowl, or a jar, for example. Pour in chilled cream. Before making ice cream, cream and condensed milk should be kept in the refrigerator for 2-3 hours.

Beat with a whisk until a stable foam. Well whipped cream, increase in volume.

How to check? Turn the container in which you whip the cream upside down. Nothing pours, so the cream is whipped well.

Add vanilla sugar and condensed milk to whipped cream. The recipe says 70-100 ml. Why, you ask? This is for the sweet tooth, if you want it sweeter, add more condensed milk. If you don't like it too sweet, add less.

Take the whisk again and beat again.

Now we need to take a form that is suitable for the freezer. Put in it, while still whipped cream. By the way, in order for the ice cream to freeze better, try to stack the whipped cream no more than 3 centimeters in height. If you are making ice cream in a large volume, in this case, lay out the ice cream in several containers.

Everything is neatly and beautifully leveled with a spatula. Put in the freezer for 30-40 minutes.

We take out, mix with a spoon, and you can also with a spatula. We clean it again, but already for 5 hours. Maybe someone’s ice cream will freeze faster, check. The main thing is that he has uniform consistency. And, if ice crystals come across, then mix again, and put it in the freezer again.

We get ready, in our case, frozen homemade ice cream. We take a creamer if you have one, if not, take whatever you want. We put the most delicious homemade ice cream as much as it goes in there.

To ice cream, if you want, you can add chocolate chips to your taste - this is grated chocolate. fresh berries, syrup, any jam, jam, canned fruits or berries, whatever you want. Or, if you don’t want to, eat plain ice cream and enjoy ...

That's all, homemade ice cream (ice cream), everyone's favorite, very delicious treat, for children and for adults is ready. Ice cream really turns out to be fantastically tasty, and very much resembles the taste of Soviet ice cream. So delicate, fragrant, well, this taste cannot be described, you should try it. Be sure to do it! I am sure that everyone in the family, both children and grandchildren, will be very happy. Enjoy your meal!
The most delicious homemade ice cream - in our selection! Prepare what you like - ice cream, creamy, chocolate!
- cream from 33% - 200 ml;
- milk - 100 ml;
- egg yolks - 2 pcs.;
- sugar - 60 g;
- vanilla pod - 1 pc.

Combine milk and sugar in a small heavy bottomed saucepan. We cut the vanilla pod along the entire length with a knife blade, remove the seeds and also add to the milk mass. Thanks to vanilla, ice cream is saturated with a delicious natural flavor, but in the absence of this ingredient, you can get by with a bag of vanilla sugar or a pinch of vanillin. We heat the mixture to a hot state, but do not bring to a boil.
In another container, gently grind the egg yolks with a whisk. In this case, we just need to achieve uniformity - we should not beat the mass, otherwise foam may form on the surface, which will complicate the process of making ice cream.

Pour hot milk into the mashed yolks in a thin stream, continuously stirring the mixture.

Pour the resulting composition into a saucepan, put on a small fire and cook until lightly thickened. It is important not to overheat the milk, otherwise the yolks may curdle! To avoid this trouble, choose a saucepan with a thick bottom for cooking the cream and cook over low heat. Also, do not forget to constantly stir the cream, especially at the bottom (it is most convenient to use a silicone spatula for this).

We check the readiness as follows: run your finger along the silicone spatula. If the trace remains clear, and does not swim with cream, immediately remove the pan from the heat.
Tip: if the yolks are still curled up, you can grind the mass through a fine sieve or puree with an immersion blender. However, unfortunately, it will no longer be possible to avoid the egg taste in ice cream. In this case, it is better to remove the pan from the heat sooner rather than later.
Cool freshly prepared cream to room temperature. At the same time, beat the cold cream until stiff.

To the whipped creamy mass, spread the cooled cream and mix. Chill the mixture in the freezer for 3 hours. During this time, it is necessary to take out the container 5-6 times and mix the mass thoroughly in order to avoid the formation of ice crystals and obtain a smooth and uniform texture.

When the consistency of the blank becomes similar to soft ice cream and will be difficult to mix, transfer the mass into a silicone mold, cover with a lid and put it in the freezer for another 3-4 hours (you can leave it overnight).
Before serving, let the frozen ice cream stand for a while at room temperature. Then we collect a slightly melted mass with an ice cream spoon and form balls. Optionally, we supplement the dessert with chocolate chips, mint leaves or berries.

Recipe 2: homemade ice cream - cream ice cream
- 500-600 gr whipping cream (fat content from 30%)
- 100 gr powdered sugar (or fine sugar)
- a pinch of vanillin

Put chilled cream, powdered sugar and a little vanillin in a deep bowl. Beat until fluffy stable foam 4-5 minutes.

Place the whipped mixture in a plastic container.

We put it in the freezer for the night.
We take out a ready-made ice cream, let it thaw a little and can be laid out in bowls.

Such ice cream can be made in different ways - with the addition of cocoa (carob), frozen berries - it is especially tasty with honeysuckle (only the berries must first be pureed with a blender, and then added to the whipped mixture and beat again).

Recipe 3: how to make homemade ice cream ice cream?
The recipe for homemade ice cream ice cream can be reproduced at home, it will turn out very tasty, natural and the taste will be like that of a Soviet ice cream.
- egg yolks (4 pcs.);
- milk (300 ml);
- cream (33%, 300 ml);
- powdered sugar (180 g);
- vanillin (½ teaspoon).

So, first of all, bring the milk to a boil and then cool it to about 30 degrees.
Add icing sugar and vanilla sugar to the yolks.

We beat.

We add milk. We beat again.

We put on a quiet fire and, stirring, hold until the mixture thickens. As everyone around advises, you can check the density by running your finger over the spatula - if a clear mark remains, the mixture is ready.

Let cool to room temperature and then refrigerate.
Meanwhile, whip the cream.

Mix with chilled cream.

We transfer the entire mixture into a container in which it will then be convenient for us to mix the future ice cream with a blender.

Then we take it out and quickly (so that the ice cream does not have time to melt) mix with a blender.

Put it back in the freezer for 2 hours. We repeat the procedure 2-3 more times with an interval of 30-60 minutes. Thanks to the blender, ice cream will have the desired structure. The blender allows you to grind ice crystals and form an air mass.
When the ice cream is completely frozen, take it out and use a special spoon to make balls. Beforehand, you can put the ice cream in the refrigerator for 15 minutes so that it melts a little - it will be much more convenient to make balls.

We spread the ice cream in bowls and sprinkle or pour over with whatever you like. I - grated chocolate. Homemade ice cream is not inferior to store-bought ice cream in taste, and it is guaranteed that it does not contain “extra” additives in terms of content. Recipe verified.

Recipe 4: homemade milk ice cream ice cream
- milk - 1 glass;
- butter - 25 grams;
- egg yolk - 1 piece;
- sugar - ½ cup;
- vanilla sugar - 5 grams;
- starch - ½ teaspoon.

In a deep bowl, combine sugar, cornstarch and vanilla sugar.
Add one egg yolk.

Grind the mass until smooth. Pour in some milk.
Send the remaining milk to the fire. Add 25 grams butter. Butter must be real, consisting of 100 percent cream from cow's milk. Bring the mixture to a boil.

Pour the egg mixture into the boiled milk. While stirring, bring to a boil. Remove from fire and send to cold water. Cool, stirring occasionally.
Pour the cold mixture into molds. It can be a large form or small portions. I have a big Silicone molds and molds for small cars.

Send the molds to the freezer for a couple of hours.
Ice cream from small molds will be ready in 30-50 minutes. Take him out of silicone molds very simple.
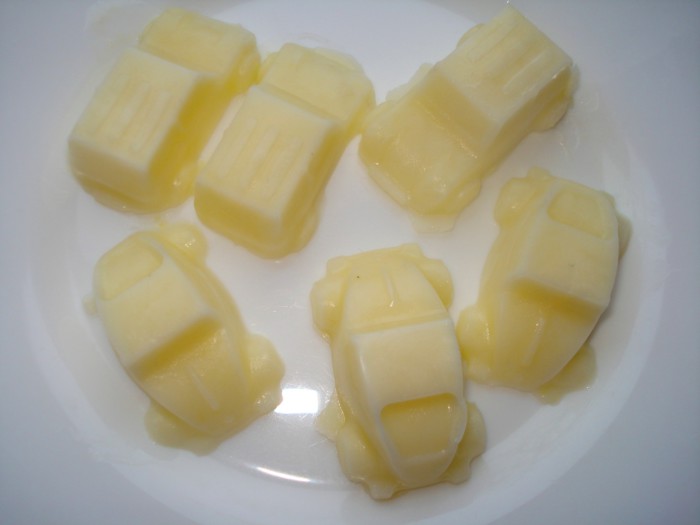
From a large mold, spread the ice cream with a spoon on portioned plates. It is incredibly tasty, tender and fragrant.
Recipe 5: how to make ice cream at home
- 0.5 liters of cream (the higher the fat content, the tastier the ice cream will be)
- ¾ cup sugar
- 4 chicken eggs
- Chocolate chip cookies (or other flavors)

Break eggs into a bowl and add sugar.
Beat well with a fork and grind the sugar. Pour in the cream and mix well again.
Pour the resulting mass into a small saucepan and put on a very slow fire. Stir constantly, do not bring to a boil, otherwise the eggs will curdle. Remove from heat, when the mass begins to thicken, the consistency should resemble liquid sour cream.
In total, the pan will spend 15 to 20 minutes on fire. Well, you can also find out the readiness of the desired consistency by swiping your finger over the spoon. If the spoon is covered in cream and a fingerprint remains, the mixture for homemade ice cream is ready.
After removing from the stove, pour the mass into any dish convenient for freezing. In general, any food-grade plastic container can be used.
Add any filler (in this case, crumbled cookies, or you can use berries, chocolate chips or pieces of fruit).
Let stand for about an hour to allow the mixture to cool slightly (the mixture will cool faster if you place the container in a sink of cold water). Then transfer the container with the mixture to the freezer. Homemade ice cream will solidify and gradually thicken. The thickening time can be from 5 to 6 hours, so it is better to do it at night or in the morning, which will be enjoyed by the evening.
Before serving, remove the container of homemade ice cream with cream from the freezer and place in the refrigerator for 20 minutes. From the prepared ice cream, roll a tablespoon (if there is no special ice cream spoon) into small balls and place in tall glasses, bowls or plates. Ice cream can be decorated with grated chocolate or berries. Serve immediately. Enjoy your meal!
Recipe 6: how to make ice cream from milk? (step by step photos)
- milk - 2.5 cups
- sugar - 1 cup
- vanillin - to taste

Pour the milk into a homemade saucepan, bring the milk to a boil, then remove the saucepan from the stove and let the milk cool to a temperature of 36 degrees.

Add sugar and vanillin to the egg yolks (if you want to make vanilla ice cream, and not regular ice cream). Mix well and grind the mass. To do this, you can use a blender.

Stir the resulting mass constantly, pouring milk into it in a thin stream.
We heat the final mixture over low heat, while not stopping stirring. The mixture should become thick.

The resulting mixture, our cream is cooled first, then put it in the refrigerator.
Pour the cream into a separate bowl. Whip the cream until it becomes thick.
Add whipped cream to the cooled cream and mix the mass.

The mixture is transferred to a plastic container, closed with a lid, and placed in the freezer for one hour. Then we take out a slightly frozen mixture, beat with a mixer and put it back in the freezer. We repeat the procedure again.

Then we leave the mass of the future ice cream for 3 hours in the freezer. Here is our ice cream. To soften the ice cream slightly, place it in the refrigerator for 20 minutes before serving.

