Cutlets in Kiev are prepared only from beaten chicken fillet in which a bar of cold butter is wrapped. Oil is mixed with herbs, mushrooms, cheese, but more often with herbs - dill. Meat preparation stuffed breaded, deep-fried and served in a certain way. And although you can order chicken Kiev in all major restaurants and buy it in grocery stores in the ready-to-cook section, cooking the heroine of several culinary legends at home is at least interesting.
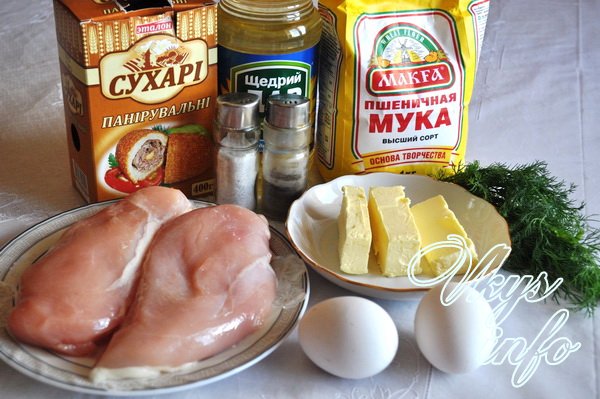
Recipe Ingredients
- chicken - broiler
- egg - 2 pcs.
- breadcrumbs - 150 g
- butter - 170-180 g
- greens
- vegetable oil for frying
- spices
How to cook meatballs in Kiev
 1 Butter with herbs - the filling you use - must be very cold, straight from the refrigerator.
 2 It is noteworthy that before the cutlet began to be mass-produced, oil was hammered into the fillet with a hammer (turning it into the most tender creamy chicken) - and only then they began to mold it and wrap it in meat. Try it yourself, but be aware that this will require accuracy, patience and time, because it requires gradually adding small pieces of oil at a time.
3 The filling may consist of butter + grated cheese, mushrooms, yolk, herbs and seasonings, and even ham. And this is not all of the listed ingredients that can be found in recipes for chicken Kiev.
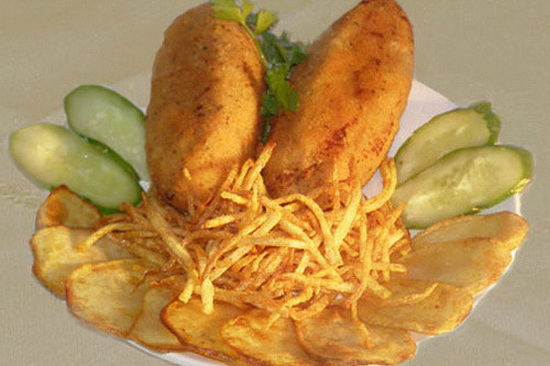
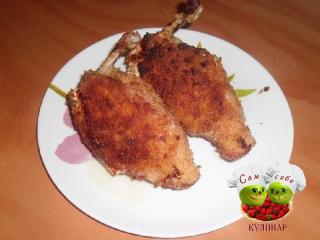
4 In some restaurants, cutlets are served on specially prepared croutons, and a chicken leg can be "stylishly" flaunted and "shod" in a paper culinary papilot. However, do not rush to grab it by the bone, hold it with a fork, otherwise it will break off under the weight of the meat.
5 Deep fryer - not the best dietary way cooking. So if you want more diet option, fry the cutlets a little in oil in a pan, and then bake in the oven. However, deep-frying is traditional, the right recipe cooking cutlets in Kiev, and it takes quite a lot of oil.
The history of the recipe for Kyiv cutlets
Chicken Kiev is a dish known all over the world. The ability to cook it is included in the mandatory program of culinary education in European and American culinary schools. And as often happens, several countries argue about the origin of the recipe.
Here he is, Appert
According to the French version, the recipe for Kyiv cutlets on the bone (côtelette de volaille - literally “bird cutlet”) was invented in the 18th century by a French culinary genius, a certain Appert. Then, as they would say now, within the framework of an international humanitarian aid program, the recipe came to Russia, which did not have (!!!) its own culinary tradition. Allegedly, Russian cook students brought him, and it happened during the time of Elizabeth.
According to the same French, after the victory over Napoleon, the Russians tried to forget the origin of many things borrowed from them, and renamed the recipe for chicken cutlets into Mikhailovsky, declaring that they were invented by a cook from the Mikhailovsky Palace.
According to the Russian version, the French have nothing to do with it, but the Mikhailovsky Palace is true. And this is our recipe, ours, at least make out the copyright! The Kiev cutlet was invented in a St. Petersburg restaurant from the Merchant Club. It was called "Novo-Mikhailovskaya", since the restaurant was located next to the Mikhailovsky Palace. It was there that they began to serve it in papillots, which was appreciated and loved by the public. The merchant club was conceived as a grandiose, luxurious project designed to demonstrate the chic and scope of Russian capitalism. But… the music didn't play for long. After the revolution, only those Novomikhailovsky cutlets remained from the idea, however, and they left the stage for a while.
The Ukrainian version is the same as the Russian one. The Ukrainians claim that the cutlets were brought to them from Russia immediately after the revolution - those same Novomikhailovsky ones. Nevertheless, they did not achieve popularity and were forgotten for a long time. And only much later, in the 50s of the last century, they were appreciated after they were prepared for diplomats on the occasion of some important event. Then they appeared in all restaurants in Kyiv and for brevity began to be called "Kiev cutlet".
There is, finally, an American version of the origin of the recipe. Of course, the Americans claim that they invented all this. Why, you ask, cutlets are called Kyiv? Very simple: because Ukrainian emigrants liked to order them. It seems that the Americans have already issued copyright ...
Alas, the modern semi-finished version of cutlets with a bone, which is sold in every grocery store, is devoid of the taste, piquancy and juiciness of its restaurant counterparts. The conclusion is simple: help yourself either in a good culinary establishment, or cook Kiev cutlets according to the recipe at home. Then enjoy.
But if you decide to order a Kiev cutlet in a restaurant, you should remember some rules with which you can easily enjoy this delicious dish ... However, you can’t say about one insidious feature of cutlets better than Pokhlebkin ...
Pokhlebkin about the recipe for cutlets in Kiev
“This dish invariably amazed foreigners with its unpredictable behavior during meals. It ruined countless snow-white shirts and expensive jackets, thus leaving an indelible mark on the memory (and on clothes) of those who dared to taste it.
When you tried to cut it with a knife (in European style, decorously), it shot out a long jet of oil, pouring sticky slurry over either the face of the eater bent over him, or his entire dress suit. In the end, foreign firms, sending their tourists to the USSR, were forced to include a special warning in their prospectuses about the careful handling of “Kiev cutlets”.
Meanwhile, Soviet restaurant visitors never got into trouble with Kyiv cutlets, because they treated them in Russian, that is, they did not try to cut them into pieces with a knife, but simply plunged the whole fork into them at once (for strength), piercing the cutlet without any compression at the same time in three or four places (according to the number of teeth in fork) and thereby ensuring uniform flow of oil from the cutlet. And then, a little surprised that the “patty is flowing”, they shook it slightly over the plate on the fork and reliably and fearlessly bit off half of it at once, without messing with all sorts of knives, ceremonies and decency. And the cutlet in Kiev did not let any of them down ... "
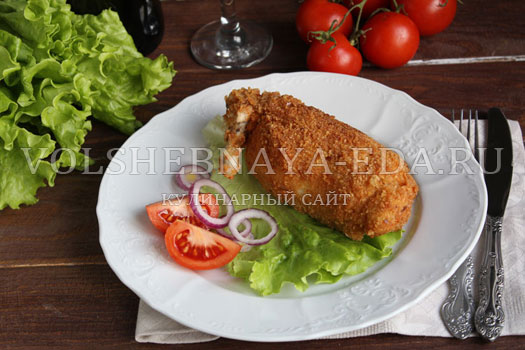
Classic cutlets in Kiev! Agree, because this dish is so famous that it can be found in restaurants not only Russian and Ukrainian cuisine. Chicken Kiev is served all over Europe and even in distant America.
It's delicious and hearty meal consists of beaten chicken fillet in the form of a cutlet, inside of which there is fragrant butter (most often with dill). It is interesting that initially this oil was hammered into the chicken fillet with a hammer and later they simply began to wrap it inside the cutlet, which greatly accelerated and simplified the process of preparing the classic Kiev cutlet.
How to cook chicken Kiev at home? No problem! The main thing is to know some subtleties. First of all, remember that the filling of the classic Kiev cutlet consists exclusively of dill butter. In addition, it is undesirable to season this dish with ground black pepper or other spices, as they will be noticeable in the juice, which should be transparent. And one more thing: after the initial breading of the chicken Kiev, you can put it in the freezer for a few minutes (so that the crust holds better), and then continue to roll it in breadcrumbs.
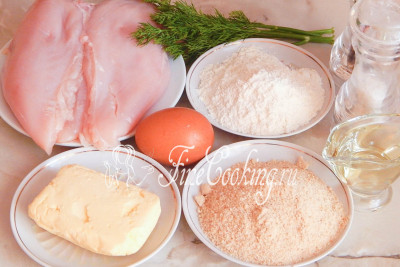
Ingredients:
(1 piece ) (3 tablespoons) (2 tablespoons ) (2 pieces ) (50 grams) (0.25 teaspoon) (1 bunch) (1 glass)
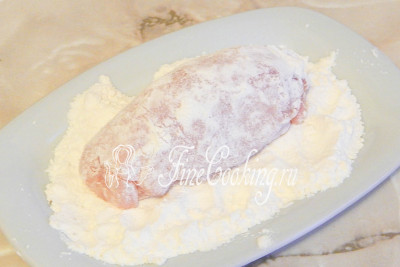
Cooking step by step with photos:
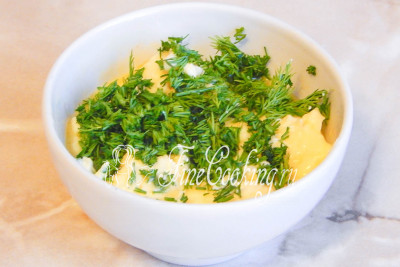
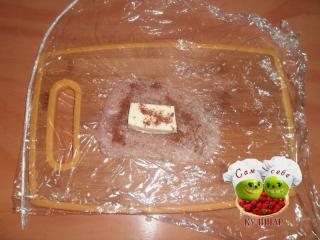
First of all, we will prepare the oil - it should be soft so that it easily mixes with chopped fresh dill. If you do not like this fragrant herb, you can do without it. So, combine the oil with dill, mix well. We will have 4 cutlets in Kiev, so we need to make 4 blanks. It is most convenient to do this with 2 tablespoons, forming sausages. We put them in the freezer while we work on the meat.
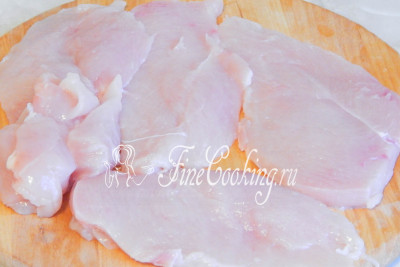
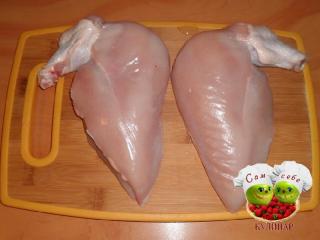
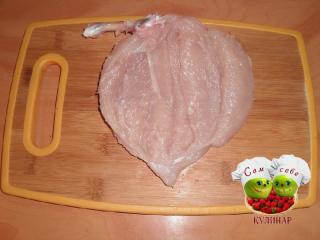
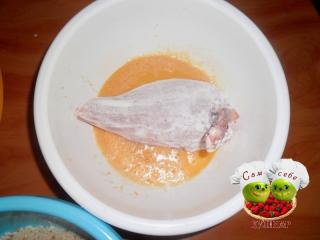
Wash and dry chicken breasts. Cut them lengthwise to make 4 flat pieces. There is an inner part in the breast, it is called filet mignon - the softest and most tender meat. We have 1 breast, which means 2 fillets. They also need to be cut so that you get 4 pieces.
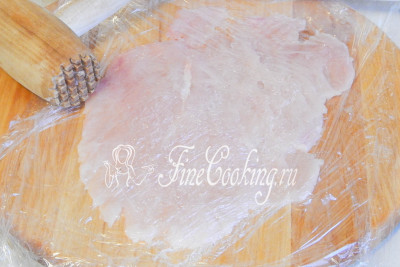
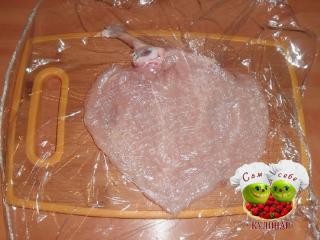
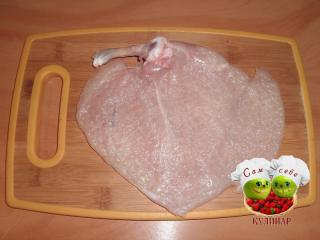
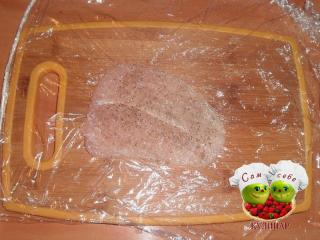
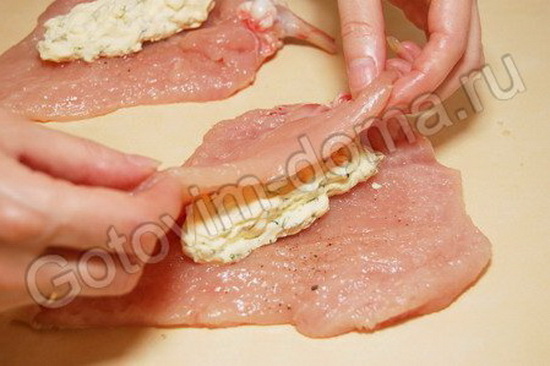
Now we will beat the meat with a kitchen hammer. To make it easier to work, and keep the table clean, put 1 piece of meat on the board, tighten it with cling film. We beat off with a hammer - our breast is well hidden, so the hammer does not touch the meat, but only the film. So we beat off all the meat. Then salt it a little to taste.
![]()
![]()
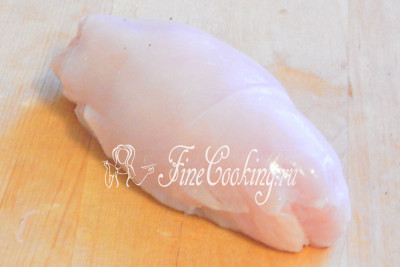
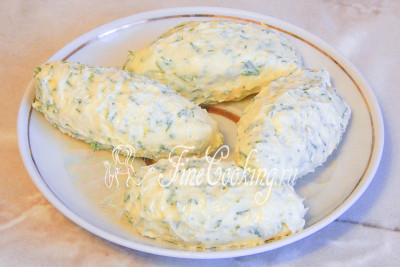
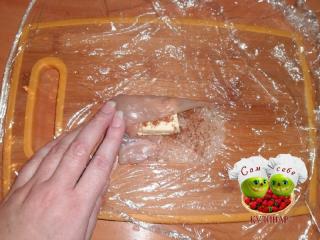
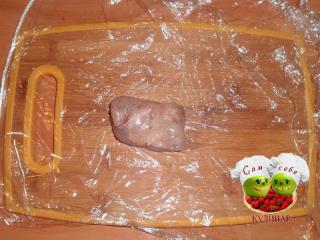
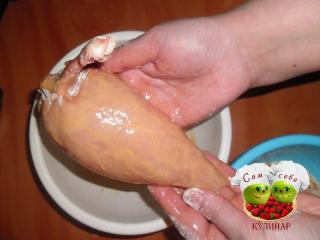
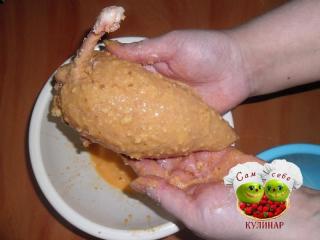
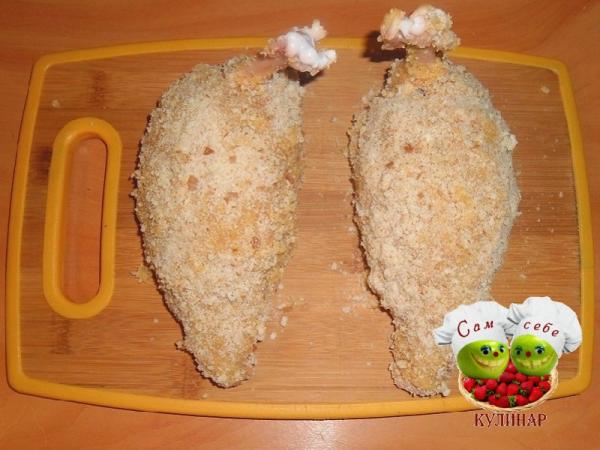
It turns out that such a cutlet, in which the oil is securely wrapped in as many as two layers of meat. This is very important, because during the frying process this oil can leak out, and this will not turn out to be a chicken Kiev. The shape of the cutlet should be as follows: it is oval with pointed ends. In total, we make 4 pieces in this way.
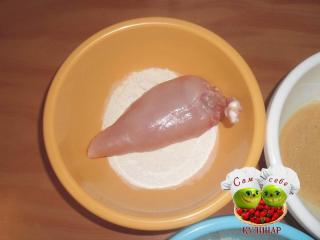
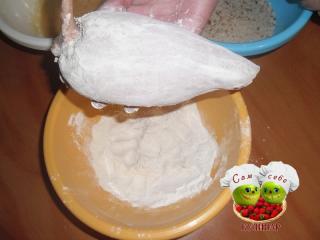
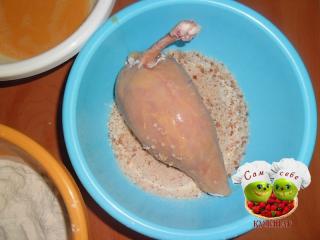
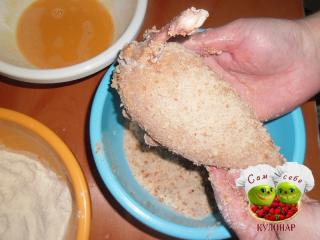
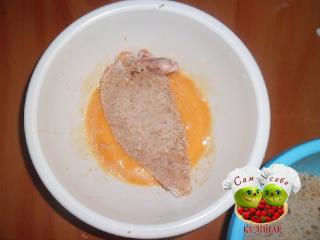
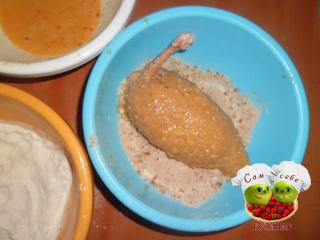
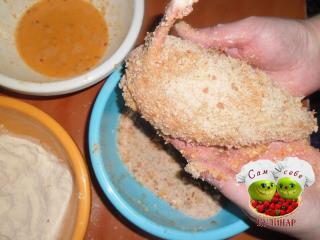
Now the primary breading - in wheat flour. As I said above, after that you can put the cutlets in the freezer for a few minutes, and then continue. In the meantime, put a saucepan with oil on the stove and heat it up.

Break up the egg and wrap the cutlets in it.
To cook cutlets in Kiev - hearty, spectacular and appetizing dish, you need to take a whole chicken breast, bread it in breadcrumbs, lezon and flour, they usually hide a piece of butter with or without herbs inside. This is characteristic hallmark recipe that gives ready meal in Kiev special tenderness and aroma.
In fact, this dish is delicious. chicken cutlets from the breast, it has been well known to many culinary specialists for a very long time, as a festive and rather laborious recipe, they were served in large restaurants, but not in all, but only in the best ones.
At home, these cutlets were taken to cook infrequently, mainly for the holidays - not everyone dared to take on cooking, since the process is quite complicated, but if the hostess bothered and cooked this wonderful and tasty dish according to Kiev - high praise was unavoidable. Classic way cooking this dish in Kiev requires the presence of a bone, that is, the breast fillet is separated along with the wing bone. So, how to cook cutlets in Kiev recipe with photo step by step ...
Ingredients
- whole chicken
- butter (100 g)
- greenery is optional
- vegetable oil
- eggs - lezon (2-3 pcs.)
- milk - lezon (3 tbsp / l)
- flour - breading
- breadcrumbs
- salt pepper
How to cook chicken Kiev recipe with photo step by step
Except whole chicken take an additional simple chicken fillet (breast), if the meat breaks during cooking, you can cut off a piece from the spare fillet, beat it off and use it as a patch. If everything goes well and no additional fillet is needed, the meat bought in reserve will not be superfluous, it will come in handy.
*********************
Chicken preparation
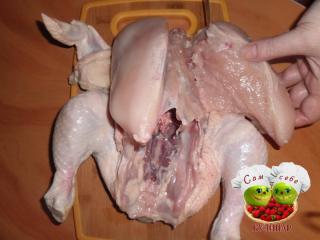
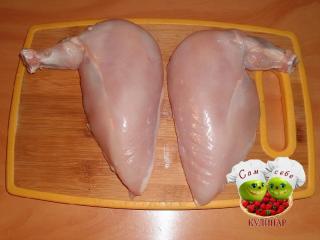
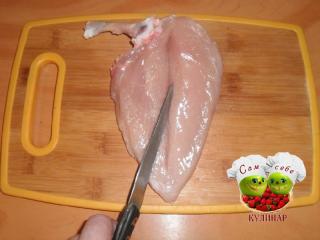
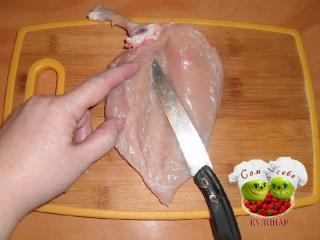
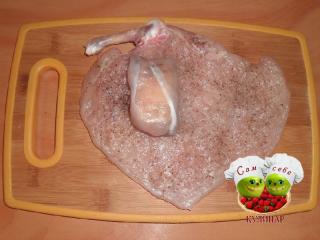
1. To prepare this delicious dish, you need to get two pieces of chicken fillet from the breast with bones from the wings. We cut off the wings at the joint and free the chicken breast from the skin, make an incision along the keel bone of the breast.
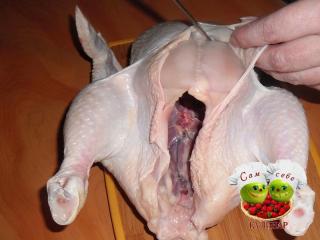
Cut the fillet with wings
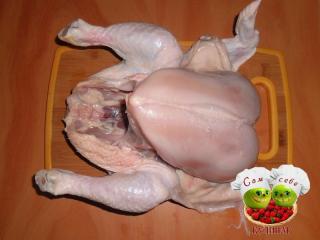
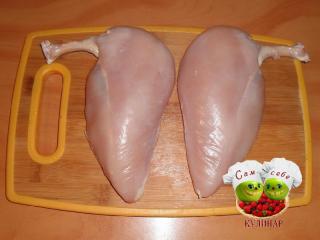
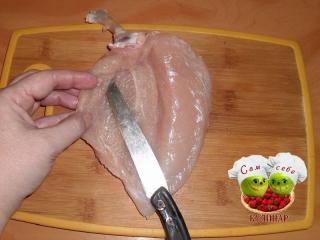
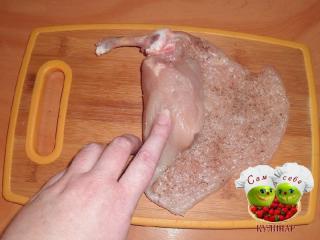
2. We begin to cut the meat along with the wing - we cut one fillet from the breast, now we need to cut the second.
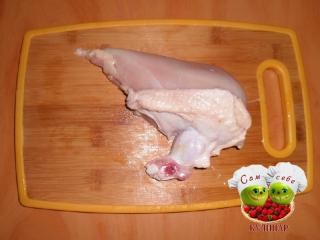
Preparation of chicken fillet with bone
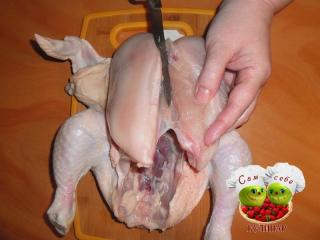
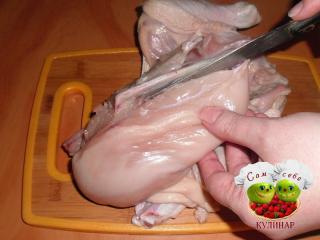
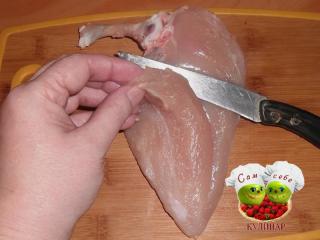
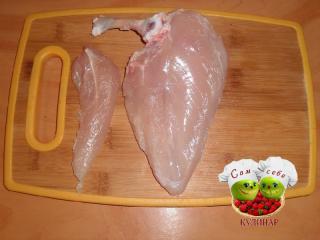
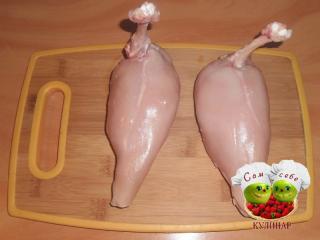
3. Let's make blanks for our Kiev dish - remove the skin from the wings, remove the meat, separate the small chicken breast fillet from the large one.
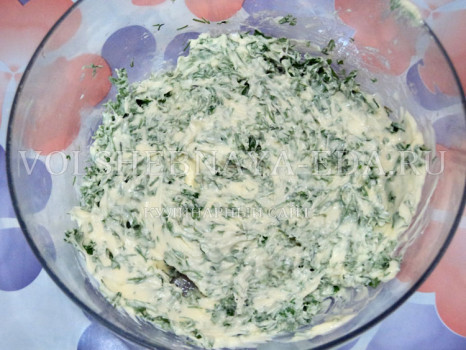
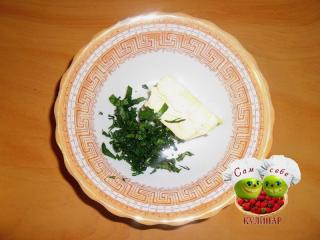
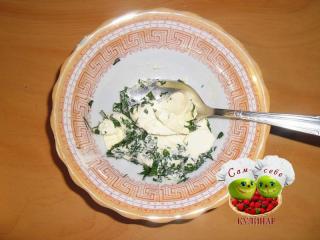
Cooking green butter
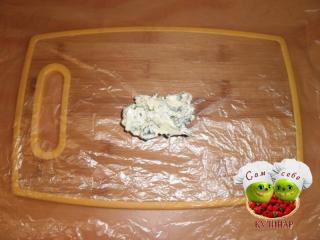
4. Prepare the filling, if you like greens, we will make green butter. We take softened butter, cut greens finely, combine butter and greens, mix. Not everyone in my family likes greens, so I will use plain butter for the Kiev dish. Let's put it on cling film, roll up the sausage and put it in the freezer.

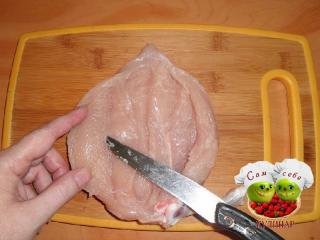
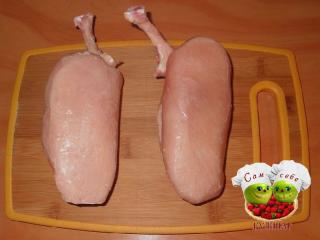
Chicken fillet preparation
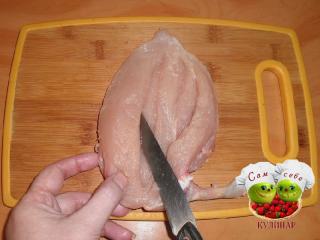
5. Carefully and carefully, so as not to cut through the meat, make a shallow cut in the middle of the piece of meat and then several cuts to the left and right, as far as the thickness allows, so that the chicken meat opens like a book.
We beat off the chicken fillet
6. We cover the large fillet with cling film, beat it off, we do the same with the small chicken fillet, I advise you to put the meat between two layers of the film so that it does not tear when the chicken meat is beaten off - salt and pepper.

Wrapping the butter
7. Take a small breast fillet and put a piece of butter on it. If you have prepared butter with herbs, take it out of the freezer, divide it equally and put a part on the meat, wrap it in a small fillet as you like, trying to hide the butter completely.
We form delicious meatballs
8. We put the wrapped small fillet on the large one and wrap it tightly, but carefully, otherwise the chicken fillet will tear. The "tails" that turned out from the bottom of the Kyiv cutlets can be tucked inside. Let's send the blanks to the freezer for 20-30 minutes, it will be easier to bread frozen chicken cutlets from the breast.
Let's prepare the breading
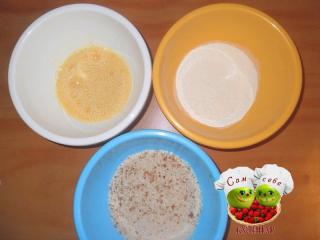
9. For breading, we need lezon, flour and breadcrumbs, it is easier to use store-bought breadcrumbs, but I suggest making them yourself. For example, dry white bread in the oven, or take pre-dried bread, rub the crackers on a grater, or chop. I use an old meat grinder to make breadcrumbs.
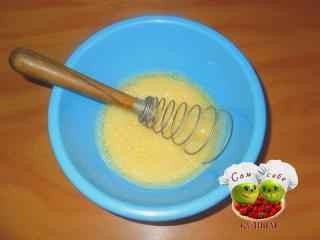
Breadcrumbs are ready, pour them into a bowl, put flour in another bowl. Let's prepare the next type of breading - lezon. We take 2-3 eggs for the ice cream (depending on the size), add 3 tablespoons of milk, a pinch of salt and beat the ice cream a little with a whisk. It will turn out three types of breading: flour, breadcrumbs, lezon.
Panning
10. We take out the frozen cutlets and proceed to breading, breading twice in breadcrumbs and ice cream to form a strong shell and to hide some irregularities, for example, breadcrumbs can be poured into the recesses, fastened with ice cream.
breading with flour
breading with lezon
breadcrumbs
again breading with lezon
breadcrumbs
Breaded semi-finished products
11. We coped with breading, the hardest part is over. Do not be discouraged if not everything worked out, I made delicious chicken breast cutlets for the second time, taking into account previous mistakes, for the first time I forgot to salt and pepper the fillet :-(. Next time everything will definitely work out!
Roasting
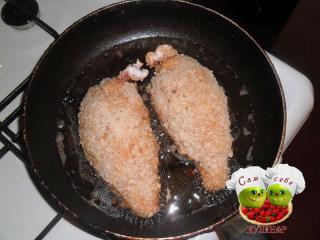
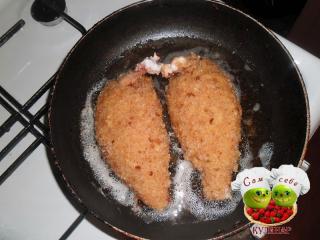
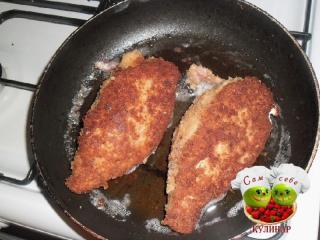
12. Fry cutlets in vegetable oil, it is advisable to do this in deep fat until golden brown, then bring them to readiness in the oven for 4-5 minutes. But you can also fry in a well-heated pan so that they are covered with oil to the middle, 2-3 minutes each side, put in a baking dish, send to an oven preheated to 200 degrees for 5 minutes.
If the oven does not work, fry in a pan, but the oven is preferable. My oven was not working at the moment, I managed with a frying pan, it turned out delicious.
Serving ready cutlets
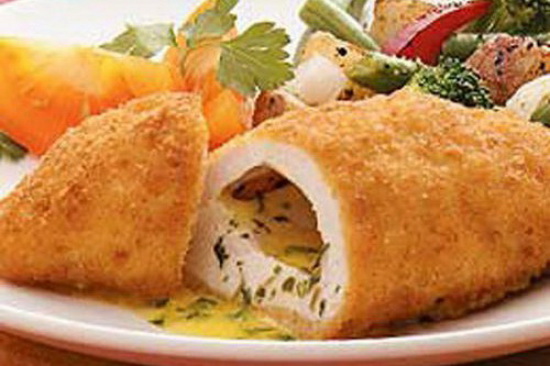
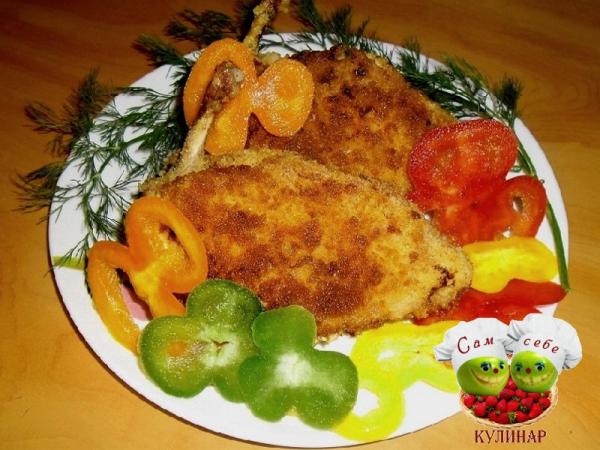
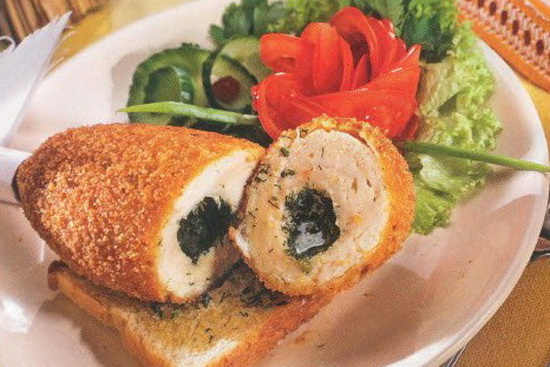
13. Cutlets are ready, if they are cooked correctly, then melted butter flows out of them when cut. Due to the fact that it is inside the meat during frying, the cutlets become so juicy, it is advisable to decorate them with herbs and vegetables.
Serve as a side dish, for example, boiled or fried potatoes, although it may not come to a side dish, because the portion is large, sometimes even huge - it’s enough to get enough and even more ... But it all depends on your appetite and the size of the chicken you purchased.)))
Now we know how to cook Kiev cutlets - a step-by-step recipe with a photo. I hope that this cooking method was useful to you, the dish turned out tasty, beautiful, guests and family appreciated your work. I wish you good mood, further success in cooking!
What other cutlets can be cooked or other chicken recipes?
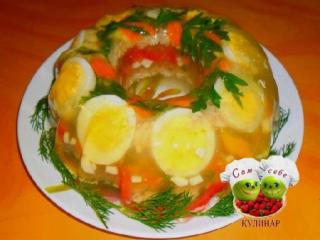
By the way, if you have difficulty cutting a chicken, you can read how to facilitate this process in the article how to properly cut a chicken. If the recipe described above seemed complicated to you, you can cook Kyiv cutlets from minced chicken, or cook meat zrazy with mushrooms and cheese. I also advise you to cook aspic chicken - a beautiful and tasty dish that can be served on the festive table.
Meat zrazy with mushrooms and cheese
If you want to taste something very tasty from chicken fillet, you should cook Kiev cutlets. The recipe for such a dish is known in many countries, so it is often served in restaurants. AT classic version the cutlet is cooked on the bone, but for this you need to have a whole chicken. I suggest cooking it from boneless chicken fillet.
We will prepare festive and very delicious meatballs in Kiev from chicken fillet with double breading, cutlets will turn out juicy and fried, as a filling we will use a piece of butter and chopped greens.
Cooking time cutlets - 1.5 hours, first we fry them in a pan, and then send them to the oven to bring them to full readiness.
The number of servings is 2.
How to cook chicken Kiev meatballs
1. A small amount of finely chop the dill. 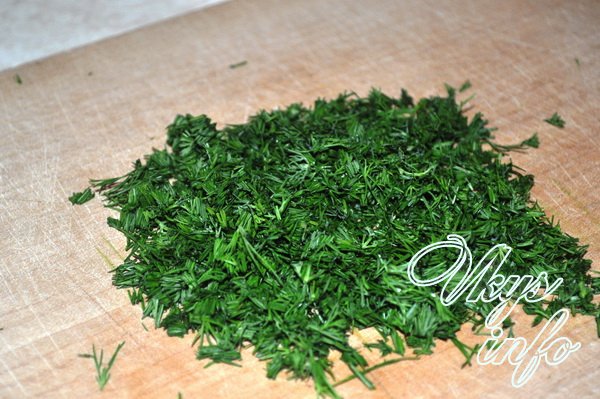
2. Take the chilled butter and cut it into cubes. After that, roll them in dill. Butter with herbs can be made with a margin, as it will be useful to us for other dishes. 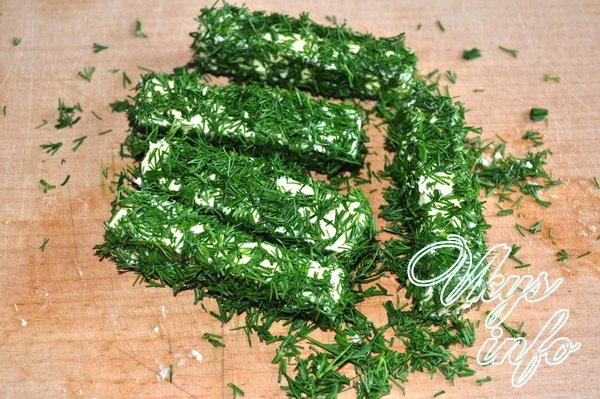
3. We will cook from two chicken fillets, each of which has several parts. Separate a small part of the fillet from its larger part. excess fat and cut the film. 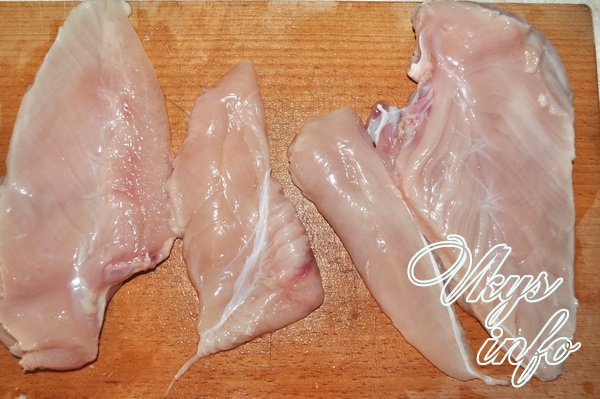
4. Carefully cut a large fillet lengthwise with a knife. 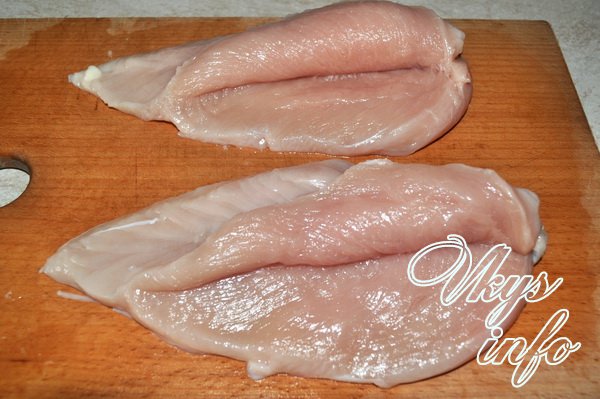
5. We make an incision so deep that you can unfold it like a book. We cut off its lower part (sharp). As a result, we get a semicircular rectangle. 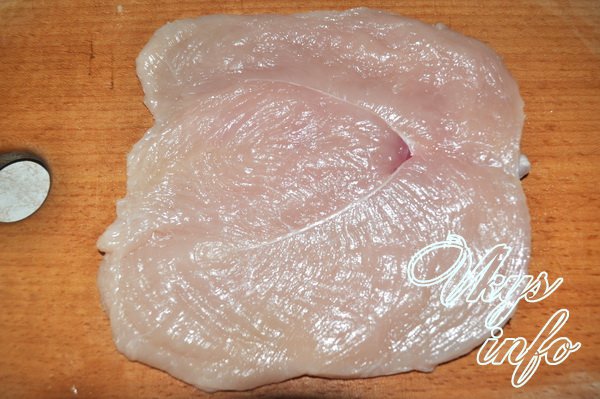
6. We put each fillet between two food films and carefully beat it off on both sides. 
7. Salt and pepper the beaten fillet to your liking. 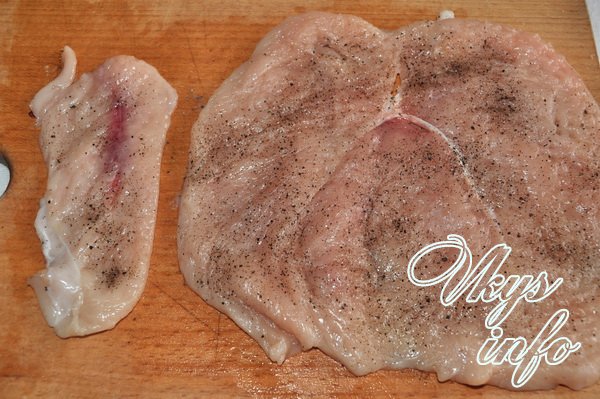
8. Put a stick of butter with herbs on a small fillet.
We wrap it so that it is closed on all sides.
If a small hole is found on a large fillet (although you should try not to), you can not be afraid. Butter will be wrapped in meat several times. We will also make a double breading. So it shouldn't leak. 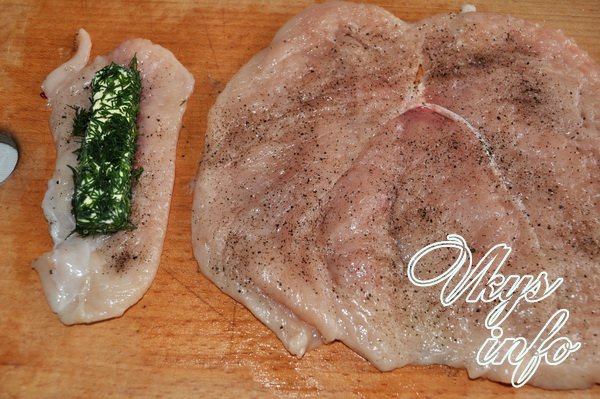
9. Put a small fillet with butter on a large one. 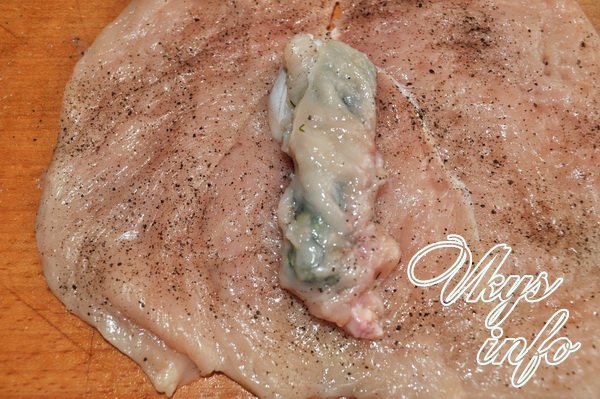
10. We wrap, bending the edges from above and below. If you find extra (or crooked parts), you can cut them off. Then chicken Kiev meatballs will turn out to be more beautiful. 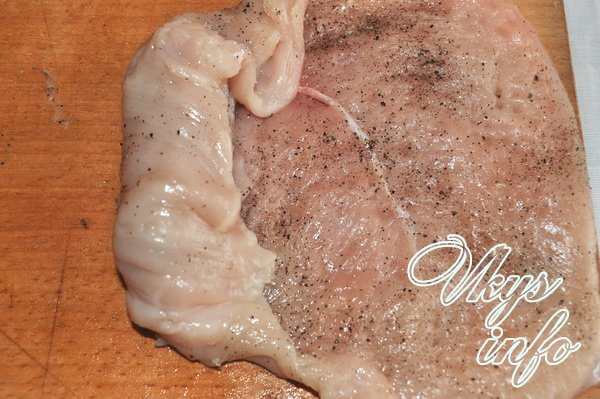
11. Roll it in flour and put it in the freezer for 30 minutes. While the cutlet is cooling, we turn on the oven at 200 degrees, let it heat up. Pour vegetable oil into a small saucepan (not to the very edge) and put on fire. 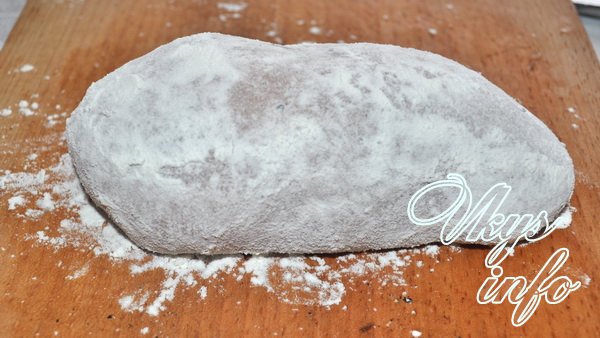
12. Beat two eggs in a separate container. 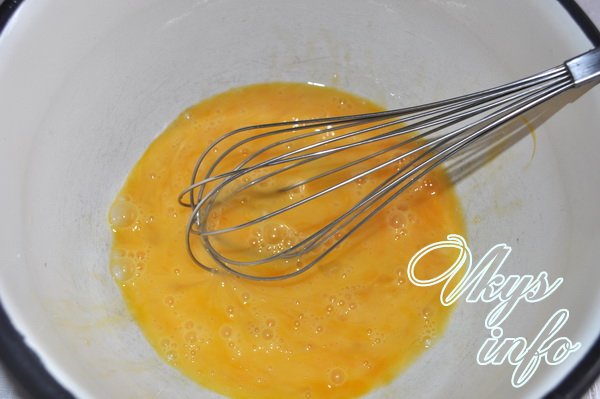
13. When the oil in the pan is warm enough, you can get our cutlets from the freezer.
Dip them in the egg. 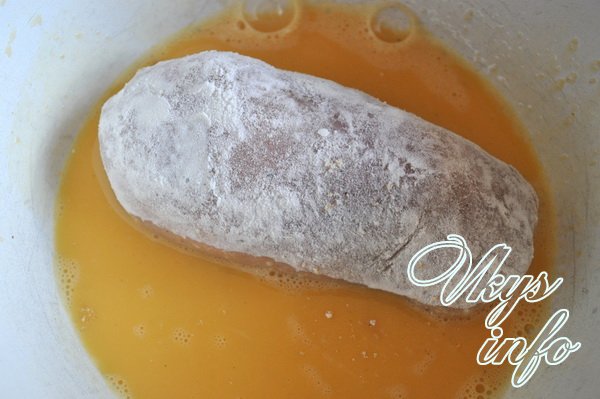
14. After that, roll the cutlets in breadcrumbs. 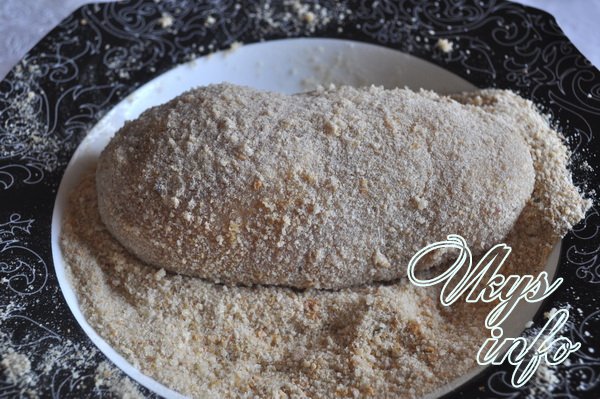
15. Once again, dip into a beaten egg. 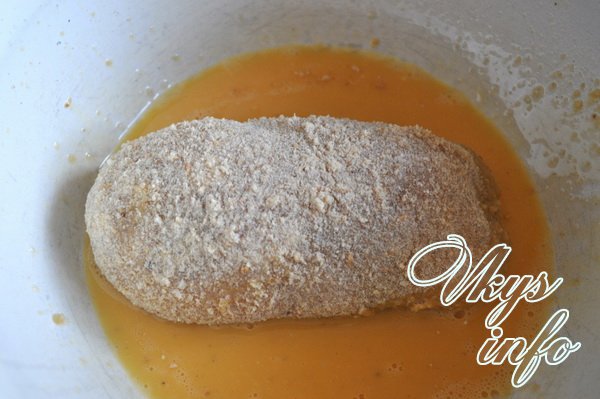
16. The second time we bread cutlets in breadcrumbs. 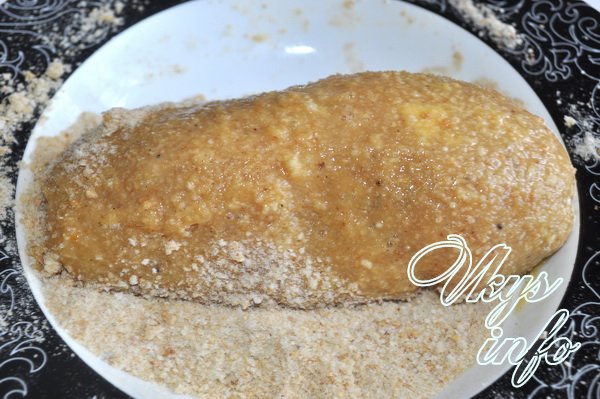
17. Lower carefully into hot oil. It will bubble up, so be careful not to get water in there. When the cutlets are browned (after 5 minutes), you can get them with a slotted spoon. 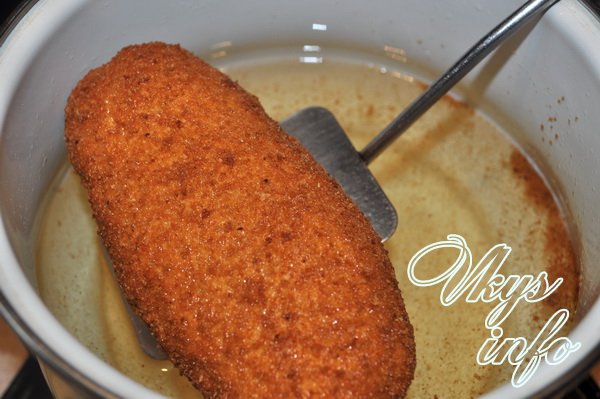
18. Put them in a mold and put in the oven for 10 minutes. 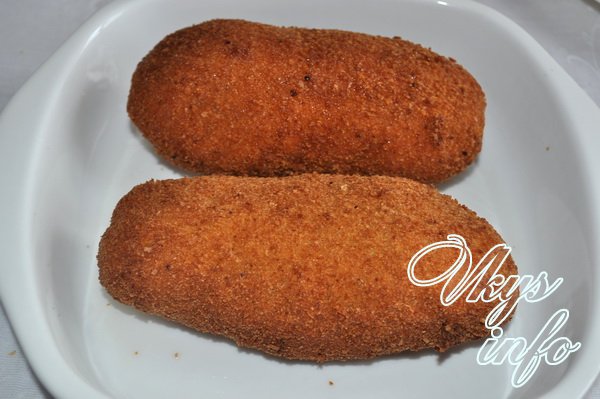
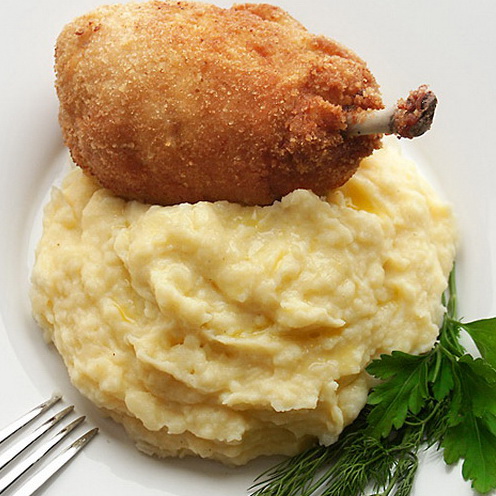
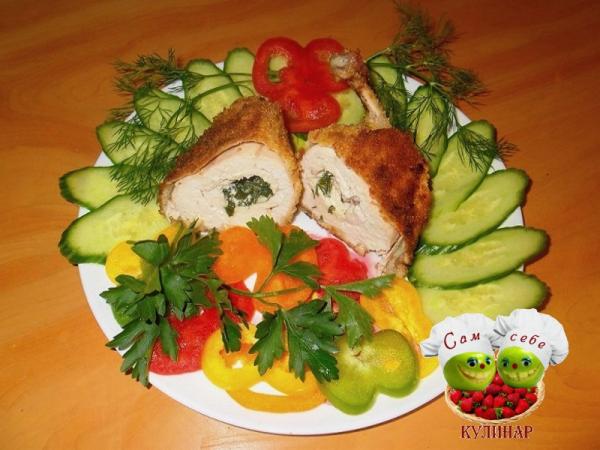
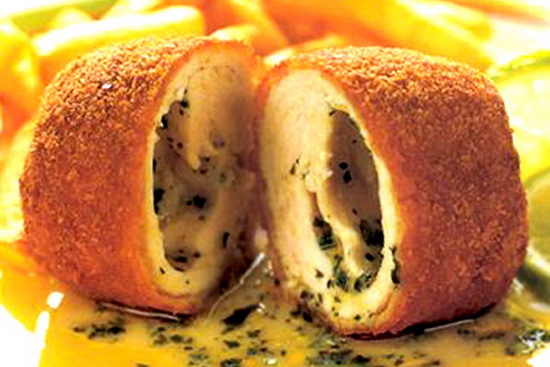
19. Put ready-made juicy and at the same time crispy cutlets in Kiev from the fillet on a plate and decorate. They will go great with them. vegetable salad, mashed potatoes, rice, buckwheat. 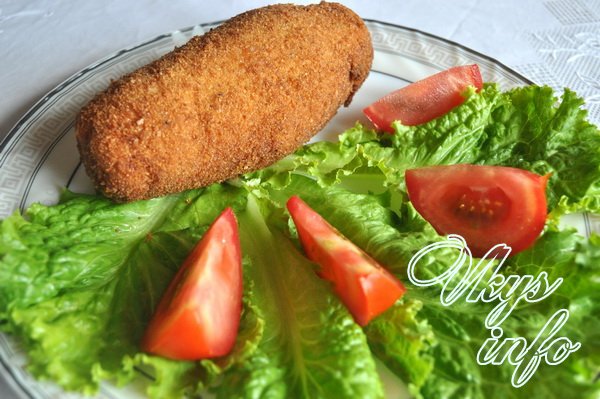
It is difficult to imagine a person who does not like meatballs. Often they are prepared from minced meat prepared from various kinds of meat, fish, poultry and even vegetables. But here classic cutlet Kiev is prepared a little differently. At the very beginning of its appearance, it was prepared as follows. The chicken fillet was beaten with a hammer, the butter in the process was simply “driven” into the meat.
Just after the meat became thin, it was salted, peppered, and then smeared with butter again. This gave the finished dish extraordinary taste and tenderness. Of course, during its existence cutlet in Kiev has undergone changes, and now the hostesses put a piece of butter in it. But the rest of the sequence remained almost the same.
Classic recipe cooking is like that. The butter is wrapped in a beaten fillet, putting inside also chicken bone. This is done so that it is convenient to eat a cutlet. Then, such chicken leg» dipped in egg mixture and rolled in breadcrumbs. This cutlet is sent to the refrigerator, after which it is exposed heat treatment deep-fried.
It is worth eating such a cutlet exclusively with your hands. But be careful! The meat is very juicy so don't burn yourself.
Kiev cutlets: recipes
Of course, now there are many recipes for cooking cutlet in Kiev. Each recipe has its own subtleties and raisins. If desired, you can add various fillings to the fillet in addition to butter.
"Cutlets in Kiev original"
To prepare "Cutlets in Kiev original" you will need:
- 1 PC. skinless chicken breast
- 100 g butter
- 1 PC. egg
- 100 g crackers from white bread
- 50 g parsley
- 1\3 tsp salt
- 1/4 tsp freshly ground black pepper
- 100 g vegetable oil
Recipe for "Cutlets in Kiev original"
- Before you decide to cook this dish, make sure that you have two bones from the legs or wings of the chicken.
- Now start cooking. Wash the chicken breast. Carefully cut the fillet in half and make cuts. You need to get a big layer. It must be put on cling film, covered with it and on top. This is necessary so that the juice does not come out of the meat, and does not splatter everything around.
- After that, carefully beat the fillet. Rub it with salt and sprinkle with a little pepper. In the meantime, prepare the filling. To do this, first you need to pull the butter out of the refrigerator and let it thaw a little.
- Wash and chop the parsley. Mix thoroughly with oil. After receiving homogeneous mass, form small even patties with a spoon. Send the resulting filling for a few minutes in the freezer.
- After it freezes, proceed to the formation of cutlets. To do this, beat the egg in a bowl, chop the crackers and put on a flat plate. Put the pieces of butter and bones in the fillet, gently swaddle them. Dip the meatballs in the egg and then in the breadcrumbs.
- After that, repeat the breading process again. Put the resulting cutlets into the heated vegetable oil and fry thoroughly.
"Kiev cutlets with mushrooms"
To prepare Chicken Kiev with Mushrooms, you will need:
- 1 kg chicken breast
- 10 pieces. chicken eggs
- 20 g sour cream
- 400 g loaf
- 200 g butter
- 300 g mushrooms
- 1 PC. medium bulb
- 100 g dill or parsley
- 800 g vegetable oil
Recipe for "Kiev cutlet with mushrooms"
- To get started, start preparing the filling. Chop the mushrooms and onion, fry them together. Butter cut into small cubes.
- Wash greens thoroughly, dry and chop. Cut the breast into layers and beat well. Salt the resulting plates a little.
- Spread the mushroom mass on them, a piece of butter and sprinkle with herbs. Then, carefully wrap the cutlets and put them in the freezer.
- Prepare a breading from a loaf, beat the eggs with sour cream. Dip cutlets in eggs and breadcrumbs, then fry.
Enjoy your meal!