There are a lot of ways to salt fish before drying it.
Here we give only general "universal" recommendations for salting and drying. different fish. You can also download a selection of 17 books on salting, drying and smoking fish and meat (link below).
Drying fish consists of three stages:
salting;
soaking;
drying.
Salting fish for drying can be done in two ways: wet and dry ambassador.

Salting fish in brine
Wet salting salt not very large fish(weighing up to 200-500 g). In the cool season, the fish can not be gutted, in the warm season they must be gutted. Clean fish is not washed, but only wiped with a dry towel.
Prepared fish is placed in an enameled bucket, basin or pan, after pouring salt on the bottom. The fish is laid in tight rows: head to tail, back to stomach. Each row is richly salted. So much salt is poured onto the top row so that it covers all the fish. To give a special taste, you can add a little sugar to the salt..
A plank is placed on top in the shape of dishes and it is oppressed (only to drown the fish in the resulting brine). 4-5 hours after salting, the fish itself releases the brine. The fish is salted for 2-5 days (depending on the size of the fish). For the entire period of salting, the fish must be placed in the coldest possible place (in summer heat, preferably in the refrigerator).
Before hanging for drying, the fish salted in this way is soaked in a large amount of water for 2-5 hours, depending on the size of the fish and the time of its salting.
Salting fish with dry salting
Dry salting larger fish. Each fish is cut along the back and unhooked. Remove the insides, then wipe with a dry cloth. Sprinkle the inside of the fish generously with salt. Carcasses of fish are placed in rows in a wooden box, so that the abdomens are directed upwards, and salt is also sprinkled on top of the scales. The box is placed in a hole dug in a cool place, covered with plastic wrap on top.
Depending on the size of the fish, salting lasts from 3 to 7 days. In the process of salting, the fish also releases its juice, but it immediately flows out of the box through the cracks. This is the meaning of dry salting fish.
In a dry way, you can also salt small, gutted fish. A clean rag is spread on a wide board, the fish are laid in rows head to tail, on top of each other, sprinkled with salt and wrapped in the same rag. From above, the “package” is covered with another board and oppression is put on it. The juice flowing from the fish will seep through the fabric and flow onto the ground.
Salted fish is washed and soaked for 2-14 hours, changing the water 2-3 times. The soaking process ends when the fish starts to float.
Drying fish
After washing, the fish is very wet, so it is hung out at night so that it is weathered (flies lay their larvae only on a wet surface, and there are no flies at night). In the morning, the fish is sprayed with a solution table vinegar- Its smell repels insects. Then the fish is hung in the shade in a ventilated place.
An ideal place for withering fish is a special ventilated oven.
It is not necessary, but such fish as fish, blue bream, shemaya are hung upside down, and sabrefish, bream, ram, pike perch - upside down. Why is that? It is not known for certain, and this is just a recommendation. From the point of view of common sense, it is better to hang any non-gutted fish by the tails in order to prevent the bitterness from the gallbladder from running down all over the fish.
Drying lasts from several days to several weeks - depending on the size of the fish.
A selection of books on salting, drying and smoking fish and meat:
The presented collection of books contains all the necessary information about the methods and technology of smoking, salting, curing meat and fish at home. In addition, this collection contains books on making from improvised means different kind devices for smoking and drying fish and meat!
Books included in the collection:
- Preservation of the catch and methods of preparing fish
- Delicious meat. Dried, smoked, baked
- Homemade salo and smoked meats
- Salting, marinating, curing, smoking
- Summer kitchen, barbecue, smokehouse, pergola
- Canning, smoking, winemaking
- Homemade electric smokehouse
- Smoking and salting of meat products
- Proper smoking and drying of fish
- Homemade smoked meats and sausages
- Salted, dried, smoked fish
- Salted, smoked, dried fish
- Basics of smokeless smoking
- All about smoking products
- A fish. Drying. Smoking
- We smoke, dry, salt
- country smokehouse
Format:PDF
The size: 97 Mb
It can be useful: 150 fish and meat cutlet recipes — download
0
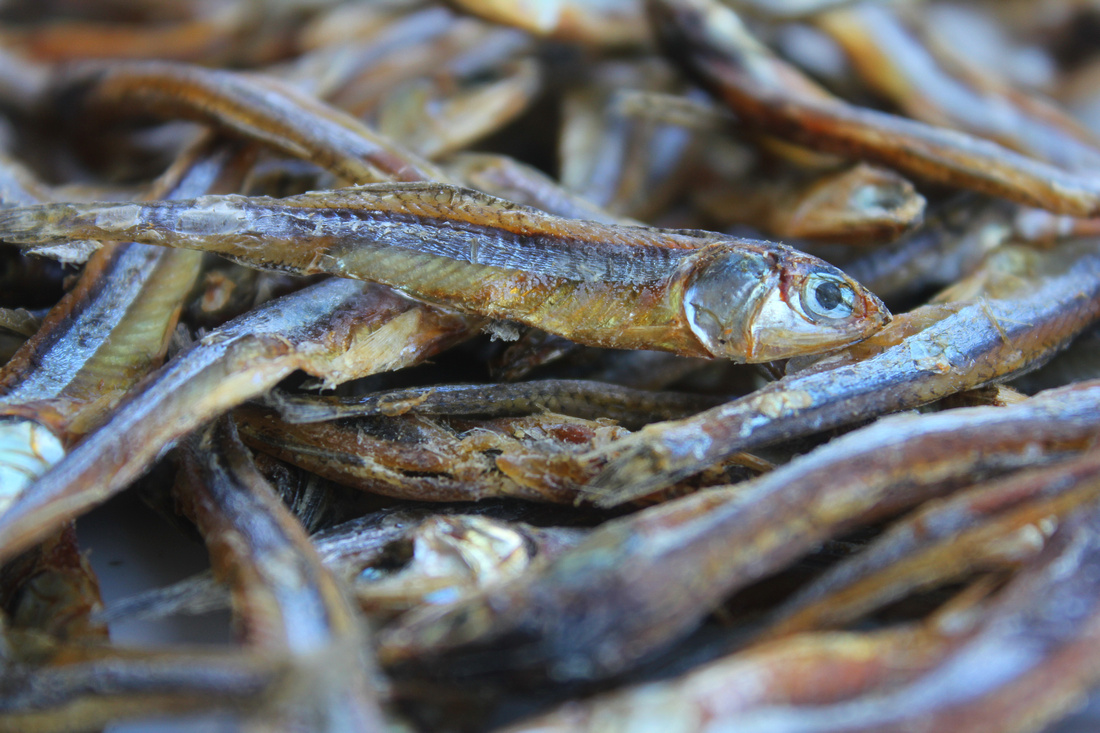
Dried fish is delicious and useful product. For cooking, fresh fish does not need to be heated, exposure to the surrounding atmosphere is enough.
Dried fish meat is dry and elastic, it is not for nothing that it is often called dried. It is stored for a long time without requiring special conditions.
This great snack, which can be served at the laid table or taken with you on a trip.
Dried fish is called fish, which, after preliminary salting, is dried in vivo.
Slow curing outdoors or in a well-ventilated area changes the properties of the fish and gives it a sharp taste. spicy taste. This process is also called drying.
Slow dehydration in combination with the influence of the external environment leads to the gradual maturation of meat:
- Protein tissues are impregnated with fat and become dense and elastic.
- The flesh looks translucent and acquires a beautiful amber color.
- Caviar turns into a particularly delicious grainy delicacy.
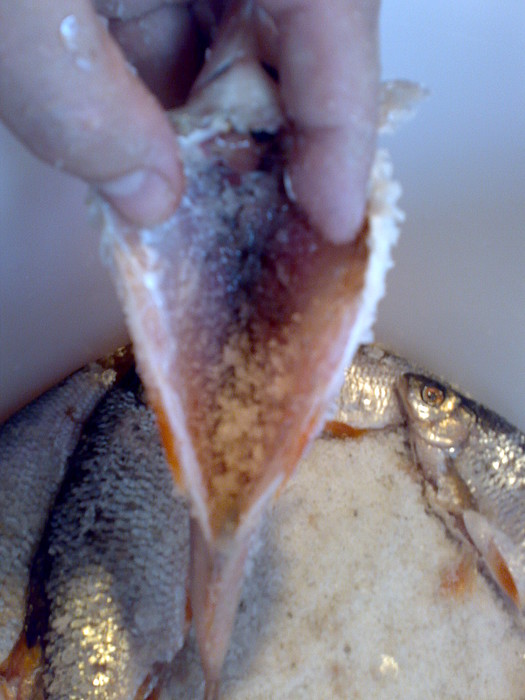
In general, the piquant taste and sharp spirit of dried fish are unique and easily recognizable. The skin, silky to the touch, with silvery scales, is easy to remove, and the salty strips of meat can be eaten.
What kind of fish can be dried at home?
Not every fish gives a good result when dried and dried.
It is necessary to take such varieties, the meat of which is able to ripen properly, acquiring a specific texture and smell characteristic of a dried product.
Medium-sized breeds, which are considered of little value in industrial fishing, have an excellent taste in dried form. These are vobla, ram, sabrefish, silver bream and other species belonging to the so-called partial. Of the larger ones, bream, pike perch, catfish can be recommended.
Has the best quality fresh fish, salted on the day of fishing. The catch, which was stored in an insufficiently cold place, may already be “smelly”. Such “bear-like” drying is popular among the northern peoples, but unaccustomed people may not like this result.
Sometimes dried and frozen, and then thawed fish. It is recommended to buy mackerel, herring, flounder, halibut. You can also freeze your own catch for later drying.
The tastiest is fish of medium and high fat content. Its quality is highly dependent on the time of year. Before spawning, the fat content is higher, so a catch made in early spring or winter is recommended for drying.
Preparing fish for proper drying
In no case do they clean off the scales, and the smaller fish do not need to be gutted. Fat of the peritoneum and viscera gives a more intense taste.
In herbivorous species, the entrails are taken out in summer, as the contents of the stomach quickly deteriorate and give bitterness to the abdomen.
Large specimens are cut completely. They are gutted, leaving the skin and scales intact. The abdomen is left intact so that the fat is stored inside. To extract the insides, a longitudinal incision is made along the dorsal fin. The cut carcass and its parts are not washed with water.
Dried fish in the summer at home: cooking steps
The drying process is based on many years of experience and has a certain sequence of actions that differ only in details.
- Salting. Produced in any suitable container. The fish is sprinkled with salt or poured saline solution and put in the cold until it is salted.
- Washing and soaking. Used cold fresh water, the time depends on the duration of salting.
- Drying directly. Occurs in natural conditions or with the use of any devices.
Summer salting methods
In addition to salt and dishes suitable for food products, for salting nothing is needed. Any container of sufficient volume made of steel, glass or plastic will do. Important to choose right sort salt. Large, when dissolved, slowly takes moisture from the fish, which is what is required before drying. fine salt penetrates the meat too quickly, and dehydration does not occur.
Dry way
 When drying large specimens weighing more than a kilogram, the best results are achieved by the dry salting method.
- The fish carcass is freed from the insides, cut from the back, and cleaned with a rag.
- The internal cavities are salted abundantly, but without frills.
- The carcasses are laid out in dense rows in a basket or box, the bottom of which is covered with a layer of fabric. Lay according to the rule: head to tail and bellies up.
- Sprinkle with salt again, right on top of the scales. In total, you need to cook about 1.5 kg of salt per 10 kg of fish.
Having closed with a flat lid, the contents are pressed down with oppression - a stone or a jar of water.
Oppression helps to get rid of air bubbles in which harmful bacteria remain. Also, under pressure, the meat is better compacted.
Salting in a cool place takes from 5 to 10 days. Gradually, juice begins to stand out, which flows through the cracks at the bottom. This is where the name "dry" technology comes from.
From small fish, which is also sometimes salted in a dry way, the insides can not be removed. The fabric is spread on a solid base, and the fish are carefully placed on it one by one. Sprinkling them with salt, they wrap them in the same rag and press them on top with a load. The fabric passes the resulting juice and allows it to flow out.
wet way
- The fish are closely placed in a pan or basin, after sprinkling the bottom with salt. They act according to the scheme: back to stomach and head to tail.
- All layers are alternately sprinkled with salt, including the top. Salt consumption is planned at the rate of 1 kg per 10 kg of fish.
- Gourmets prefer a mixture of salt with a spoonful of sugar. It makes the taste of the product more refined.
- The whole mass is pressed through the lid with oppression.
Soon after salting, brine begins to appear. After 1-2 days, it rises above the top layer and can even flow out of the container. While salting continues, the dishes are placed in the cellar. Need to support low temperature, otherwise the meat, to which the salt has not yet reached, may deteriorate.
In urban conditions, they use a refrigerator, and on a hike, a recess in the ground, covered with branches.
Smaller fish salt out quickly, 1-2 days are enough for them. The larger ones will take a week. When the fish is ready, its meat seems to harden, and the back is attracted to the spine. If you pull it by the head and tail, you can feel the crunch. If the test result is negative, it is left in brine for another day. The brine remaining after the process can be poured out or used next time.
Tuzluchny way
Before proceeding to salting in the brine way, the fish is collected on twine with a needle. Ready cuts are dipped in brine - brine, they must be completely covered with liquid. It is enough for small fish to lie down like this for 2-3 days. In the belly of large specimens, a salt solution is additionally pumped with a syringe.
To prepare a solution in a liter of water, dilute 350 g of salt. You can add brine left over from the previous salting or even from purchased spicy salted herring.
It is believed that a raw egg does not sink in a properly prepared brine solution.
The speed of salting depends on the weight of the fish, its thickness, and the permeability of the skin. At room temperature 20°C approximate salting time:
- with a weight of 2-3 kg one week;
- with a weight of less than 500 grams 2-3 days;
- a very small fish like a tyulka will only need one hour.
Readiness is determined in the same way as in the wet method. If the longitudinal stretching of the fish occurs silently, then the salt has not yet reached the vertebrae, so they do not creak. The meat of a well-salted fish does not resist pressing with a finger, if you press on the back, a hole remains.
The fish taken out of the brine is left to rest, for large specimens it takes several hours. The salt inside will evenly disperse, and the result will be of better quality.
Soaking in fresh water
Soaking is done after salting in order to desalinate the outer layers of meat. Dried skin will not become damp during storage. Therefore, this step should not be skipped, even if there is no excess salt. Approximate calculation of time: an hour of soaking for every day of salting.
The countdown of the soaking time begins already when the fish is washed from mucus and salt residues. You can wash it by hand or with a sponge, but carefully.
The scales should not fly off, it protects the internal tissues.
The fish is placed in a large container with cold water, where after a while it floats to the surface. This means that the desired state has been reached, and after drying it will be slightly salted and transparent amber.
Soaking large oily fish for too long can spoil it. The outer layers are soaked from prolonged exposure to water. It is advised to take the fish out for the same amount of time every few hours and then put it back in.
Drying rules in various conditions
As experience shows, it is most convenient to dry the fish by stringing it on a wire or cord. Low-fat varieties can be suspended by threading the twine through the tail. On the contrary, bream or pike perch should be placed upside down, dragging a needle with a string through the eye hole. Then delicious fat will not leak out of the abdomen. Also, the fish is dried on wire hooks or pricked on nails or thin rods.
On open air
Fish cured in good weather under the open sky, it turns out the most delicious. A cool spring day with a temperature of 18-20°C can be considered ideal. The lowers are hung outdoors on horizontal rails, in open boxes, etc.
It is desirable that the fish hang with their belly out and do not move close to each other. Small varieties like tyulka are dried on a horizontally stretched mesh.
In the hot sun, the fish may "cook" or begin to deteriorate before it dries. Also valuable fat will flow out of it. Therefore, it is better to hang lows in the shade or under a canopy. In case of short-term rain, they can be hidden under an awning. If it became very cold and damp, it is better to move the catch indoors.
In a cool cellar
The cellar is often used as a cool place during salting. But small fish you can hang it there after it is taken out of the brine. True, then you have to dry it in a warmer place.
Large fish dry slowly and in normal conditions may go rancid before it dries completely. Due to the low temperature in the cellar, the drying process there can last 2-3 weeks. The product obtained in this way is characterized by high palatability.
On the balcony and loggia
Ventilated balconies can be adapted for drying if necessary, especially in rainy and cold weather. First, the fish is suspended so that the juice flowing from it does not stain the floor, for example, above the basin. After that, it is hung on the walls of the loggia or the slopes are stretched across.
It is better when the fish is dried in a draft, so the windows are slightly opened even in cold weather. If the temperature on the balcony is much higher when the windows are closed, then they can not be opened.
In the attic
A well-ventilated attic is an almost ideal drying room. It heats up through the roof but stays cool due to drafts. Bundles of fish are protected there both from the direct rays of the sun and from the rain. Also in the attic there is usually a lot of space under the roof for hanging ropes. You just need to lift them high enough so that the cats do not get it.
In the room
Many do not like to dry fish in a room because of the inevitable smell, but sometimes there is simply no other way out. It may not be as fragrant as dried in the summer in the garden, but lovers are satisfied with its taste. Not bad help drying heaters.
To speed up the process, you can put a fan on the battery. Also a small amount of fish can be attached over a gas stove.
In the oven
The fish are evenly distributed in parallel rows on the wire rack. You can put foil down. The temperature regulator is set to no more than 80 ° C, otherwise the fish will simply bake. The oven door for ventilation is left ajar by 5-7 cm. After two hours, the heads should be covered with foil and the oven left on for another 4-6 hours. Dried fish is hung and dried to the final result for another one or two days.
In an electric dryer
Any electric dryer with a convective principle of operation, in which the heating is turned off, is suitable. The fish is kept in a dryer at temperatures up to 30°C. Otherwise, it is steamed and the meat begins to lag behind the bones.
The blown air from the fan provides drying, which lasts about two days. It will not be possible to escape from the smell in the room, but the result will be quite acceptable dried fish.
How long to dry and how to determine readiness?
The temperature and humidity of the air, as well as the size of the fish, affect how much time to dry the fish. The most small fish has a chance to dry in a couple of days, but more often it takes about one or two weeks. Large ones can dry for more than a month.
The fish does not need to be dried out, it is better not to dry it out quite a bit. The easiest way to determine readiness is by taste.
If the meat has not dried enough yet, leave it to hang for another day.
- Properly and completely dried meat is translucent, it is dense and elastic, with a greasy sheen.
- There are no salt crystals on the scales, the skin is strong and easily removed.
- Freshly dried fish has a specific pungent aroma that stimulates the appetite.
Dried fish can be eaten immediately after drying, but for full maturation, it must lie down in the cold for 3-4 weeks, wrapped in a rag or parchment. After resting, it will acquire its final full-fledged taste and aroma.
How to get rid of flies
The smell of dried fish quickly collects insects. Flies and wasps not only crawl on the skin with scales and eat meat. Worst of all, the flies lay their eggs in the fish that has not yet dried out, and instead of dried caviar, larvae - maggots - may appear in her stomach.
In the spring, while the flies are not yet visible (or in the fall, when they are no longer there), you can safely dry the fish. The rest of the time, it is recommended to hang it in the evening, then by morning it dries up and the flies do not besiege it so much. In an attempt to escape from flies, the drying places are hung with a net, the scales are lubricated with oil, a weak solution of vinegar. Sometimes fish is hung outside, previously already dried indoors.
How to dry fish in winter?
In winter, it is not possible to achieve the same quality as when drying in summer. Proper maturation takes place on fresh air at low humidity. In winter, it is too warm at home, the process is faster, and the meat does not have time to acquire transparency and amber luster.
For drying use balconies, attics, kitchens and even living rooms. The main nuisance during winter drying is the smell. He is omnipresent and goes everywhere. But you can not be afraid of the invasion of flies.
When drying in winter, it is better to use a dry method. The fish is salted, washed and hung to drain in the bathroom, and then the bundles are placed in a convenient place.
You can, for example, hang it near the battery or stove. But under the ceiling in the kitchen, the fish will also dry out in five days. A large number of it will not work in this way to dry, since there is simply nowhere to hang these fragrant garlands at home.
Is it possible to dry fish in the cold?
Temperatures above zero are desirable for drying fish. Severe frost destroys tissue.
But the process of freezing moisture also occurs at sub-zero temperatures.
Winter catch can be hung on a balcony or under a canopy. Although slowly, it will dry out, after which it will be necessary to dry the fish in the apartment. Thus, it is unlikely that it will be possible to obtain a high quality product, but for lovers it turns out to be a completely acceptable delicacy.
When processing and storing the catch, experienced fishermen take into account the details to make the process easier and more efficient:
- When salting, large specimens are placed on the bottom of the dishes, and small ones are placed on top.
- Carcasses of the same size are strung on one cord. Then it will be ready at the same time.
- To make drying at home faster, the bellies are opened by inserting toothpicks.
- In winter, they make a box-frame for hanging. Together with the frame, the fish can be moved from place to place.
- Balyk can be prepared from large fatty specimens by drying.
- If the fish, if stored improperly, becomes damp and acquires a musty aftertaste, it can be washed in a weak salt solution and dried again.
Dried fish is a simple and effective process. Over time, experience is gained that allows you to make the most of the available conditions and opportunities. It is necessary to carefully monitor how the properties of fish change during drying. Then you get a delicious and fragrant delicacy that can be served as a festive table, and use it at a warm friendly meeting.
In this video, an avid fisherman shares tips on how to properly dry fish.
Use either your own fresh catch or purchased live fish for such harvesting.
It is quite dangerous to salt and dry the purchased dead fish, especially if the day of its catch is a secret for you. It is quite suitable for heat treatment (frying, baking). But drying does not imply high temperatures, and harmful bacteria may well develop in fish carcasses that have lain for a couple of days in the air. Flies can also infect fish with larvae.
Salted fish is a self-sufficient preparation for long-term storage. It's delicious on its own. But further drying informs her of new taste qualities, eliminates the wateriness of meat, changes its structure and, in general, will make your fish a more refined gastronomic product.
First stage: salting
We gut the large fish, remove the gills. Small can be salted without this procedure.
Choosing the right size tray wooden tub. If there are a lot of fish, it is convenient to use a plastic baby bath.
Rub the fish with salt against the scales on all sides.
Pour coarse salt into the bottom of the container. We lay the fish on the backs in layers, move it more tightly, sprinkle with salt. If the fish is “various in size”, we lay larger carcasses in the first layer.
We cover with a cloth, place a board on top, put a load on it. We send to the cold.
We try the pickle after 3 days.
Now it's time to learn how to dry fish at home.

Second stage: withering
Cord
Prepare a thin cord, twine or soft wire. A thin radio-technical stranded wire in vinyl insulation is suitable.
To pass the cord through fish heads, to pierce the bones, you will also need an awl or just a long sharp carnation.
Place
We determine the place of drying. There are 3 requirements for it:
- during the day - a shadow;
- around the clock - draft;
- rain protection.
Ideal conditions for drying are provided by a canopy open to the breeze. A great place is a country veranda, a gazebo in the garden.
natural protection
By the way, if an old walnut grows on your site, hang the fish on branches right in the crown.
The leaves will provide shade, and the pungent nutty scent will repel insects. True, if rainy weather occurs on the days of drying, the knitting will need to be removed.
The fish will also take on the nutty flavor, and its meat will turn out to be quite savory.
Stringing, hanging
Shake off the salt from the fish.
If we want to make it less salty, put it in boiling water for a few seconds.
In a small fish, we pass the lace through the eye sockets. You can hang it on unfolded hooks-paper clips. Large, heavy specimens will require stronger wire. We pass it through the gill slits.
We place the fish loosely, providing gaps for air circulation and free evaporation of water.

Gauze veil
Care should be taken to protect the drying fish from insects. Effective ways 2:
- sprinkle the fish with vinegar;
- cover it with gauze.
To be sure, we will do both the first and the second.
We have already mentioned the danger of flies. There is another harmful pest - wasps. They will not infect fish, but they are able to gnaw out the best meat in it to the bone.
From wide gauze or an old curtain (tulle, muslin), you can sew a bag common to the entire pendant.
Drying time
The duration of the procedure is from 3 days to 1 week. It depends not only on the size of the fish, but also on its fat content, the wateriness of the meat soaked in brine.
Humidity and temperature are of great importance.

Drying in the winter in the apartment
In winter, in a city apartment, fish can be hung to dry over a heating radiator. The upward flow of heat will dry it perfectly in a couple of days. In order not to stain the battery with dripping grease, lay a towel under the bundle of fish.
It is not necessary to cover the fish from flies (in the absence of such in winter). But if a cat or a dog lives in the house ... Then decide for yourself how to secure a seductive bundle.
kerescan - Sep 29th, 2015
Dried dried fish has a high nutritional and nutritional value, has a special color, taste and aroma. To get dried fish, it is first lightly salted, and then slowly dried under the influence of sunlight at a temperature of about 20-25 degrees.
Bream, roach, ram, mackerel, barbel, fish and some other types of fish are suitable for this cooking method. It should be noted - the fatter the fresh fish, the tastier it will turn out. finished product. In approximately the same way, they prepare balyk, teshi and bokovniki. For salmon, for example, it is preferable to use fatty and fleshy varieties of fish (salmon, sturgeon and others), after salting and drying, they can be smoked at a low temperature.
The ideal time for harvesting dried fish is spring, when the weather is dry and cool.
How to dry fish at home step by step.
- After fresh live fish has fallen into your hands, it should be put in a container suitable for this and put away in a cold place for a couple of hours, after mixing it with freshly cut grass, it is better if it is nettle.
- Small fish can not be gutted, large fish (more than 30 cm long) are cut along the abdomen and the internal contents are removed, while milk and / or caviar can be left.
- Cooking required amount twine (each 0.6-0.7 meters long) and put fish on them. We pass the needle through the eyes. The backs, as a result, should be located in one direction. Having strung several fishes, we push them, distributing them evenly along the rope. We tie the ends with a thick knot so that the fish does not come off.
- We thoroughly wash the fish, coat it with salt on all sides, not forgetting the inside of the abdomen. If the weight of the fish approaches 2 kg, we additionally make an incision on the back and tamp the salt into it.
- We fill the barrel or tub with a solution of salt (salt and water are taken 1 to 4) and put the fish there, the bellies should “look” up. We leave for 4-5 days. In the warm season, two days is enough.
- We take out the bundles with fish, put them in a “slide” and let them “lie down” and “drain” for 4-5 hours, and then rinse them thoroughly with cold water.
- Now, we hang the fish (bellies out) in the air, preferably on the side of the yard where the sun hits the maximum amount of time per day, but at the same time the fish itself should hang in the shade, under a canopy. Carcasses should not touch each other. Small fish will be ready in 2 weeks, large ones in 4-6.
And at the end of the recipe - how much and how to store the fish. It is possible to save dried fish under strict observance of the conditions - at a humidity of not more than 70%, wrapped in paper or cloth, suspended in a cool place or folded in the refrigerator - up to several months. Fish will be stored even longer in freezer if you wrap it in a plastic bag.
See also video: Dried fish, roach and silver bream (vobla, roach)
If you like dried fish, summer is a great time to do your own fish drying.
Dried fish at home is available to everyone. For drying, in most cases, the following types of fish are used: ram, vobla, mackerel, bream.
The main requirement for fish is freshness and fat content.
So, drying fish, like any other process, occurs according to the basic rules.
1. First, the fish must be prepared for salting. If the fish is freshly caught, gut it, wash it and leave it in a cool place for several hours. Large fish must be thoroughly cleaned. If you want to wither the caviar, then leave it in the belly of the fish.
In order for the fish to retain its freshness, lay it with nettles. Now, after a few hours, you can start pickling.
2. In order to dry the fish properly, prepare a special twine on which you will string the fish. For twine, you can use a special dense thread.
Thread the needle and string the fish through the eyes, with the backs of the fish pointing in one direction. Large fish should be no more than 5 pieces, small - 15 pieces. Then tie the loose end into a knot.
3. Be sure to rinse the finished ligaments in running water to remove excess blood, and then proceed to rubbing with salt. Be sure, you need to rub salt not only carcasses, but also the gills of the fish, as well as the abdomen. For big fish up to 2 kg, make a longitudinal incision on the back, rub it too.
4. Now prepare a special container in which add a 4:1 saline solution (4 parts water to 1 part salt). Next, place your bundles with fish in the container so that the abdomen is at the top. After that, the container is closed and a press is applied.
5. The duration of salting will depend on the conditions of salting: temperature regime, the size of the fish, and your preferences regarding the saltiness of the fish. In most cases, this duration is from 5 days to 2-5 weeks.
6. As soon as the salting period is over, remove the fish and rinse thoroughly in cold water. Now you can move on to drying.
7. Fish drying takes place outdoors in sunny weather. Hang the fish in such a way that the carcasses do not touch each other. This will allow her to dry well.
8. The only problem that many people face when drying fish is a swarm of flies that tend to lay eggs in a salty environment. To solve this problem, lubricate the fish vegetable oil(or vinegar) and cover with a piece of gauze. As soon as the fish dries well, the gauze can be removed and the fish dried without it. 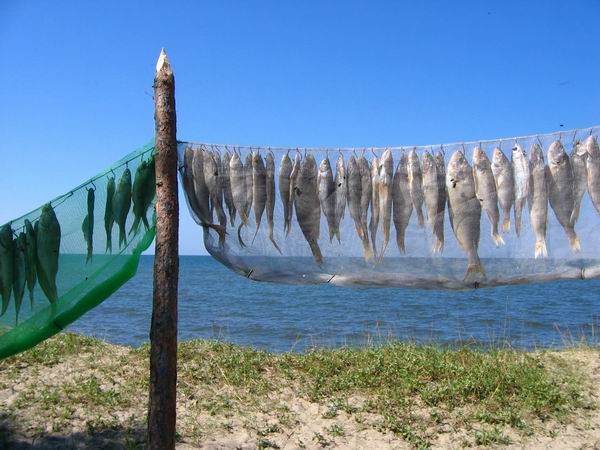
9. And, of course, pay attention to proper storage dried fish. Dried fish is stored in well-ventilated wooden boxes, or in paper bags, but not in plastic bags. Otherwise, the fish will get bad smell and taste.
Easy cooking and bon appetit!

